Showing posts with label Missouri Star Quilt Company. Show all posts

Friday, August 13, 2010

I Heart Kona Solids

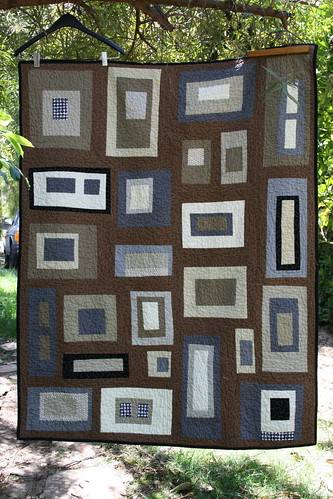
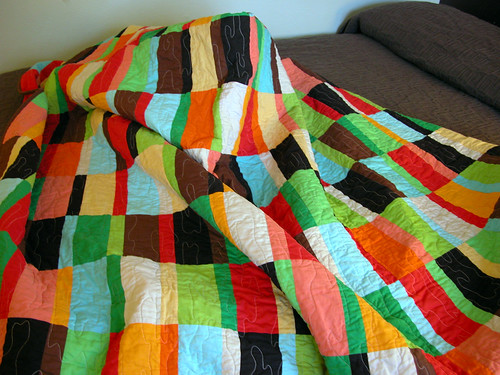
The other day I went to my local quilt shop and asked if they carried solids to which they responded "uh no" in a judging way that made me feel like I had just broken some quilting law or committed a major quilting faux pas. Well, as it turned out, they did have some solids in neutral tones of white, snow, cream, bone, toffee, brown, black, etc. I picked up some Kona Solid white because I was planning to use it for my Love Pinwheel quilt and didn't let them convince me I needed a tone-on tone instead. I love solids! In fact, one of the first quilts that caught my eye when I first started looking around was this quilt:
picture from dioramarama.com. more pictures on this flickr page
I love the mixture of colors and simple, yet (in my opinion) stunning design. In my opinion solids are far from boring! I am a big fan of Cherry House Quilts and just love the new book, City Quilts. I still haven't picked it up because I thought I might be getting it as a gift for my birthday but didn't so I will be picking it up soon! This one from the City Quilts book is called City lights:
on the Cherry House Quilts blog

It really reminds me of a sky scrapper! I really love this quilt called The Tempest. I remember her first post about this quilt where she described how she was trying to get a good shot of it down by the water but in the process of backing up on the dock to get the photo just right, she fell into the water! That definitely sounds like something I would do. Don't worry, she was ok and so was the quilt. Purple is probably my favorite color (it's really hard for me to pick just one color) and this quilt sings to me.
on the Cherry House Quilts blog
Even though solids are frowned upon by more traditional quilters (and apparently my local quilt shop), they are very popular among modern quilters alone or in combination with modern prints. For example:
from apartmenttherapy.com
from amyscreativeside.com
from filminthefridge.com
from handmadebyalissa.com
from ohfransson.com
I used Kona Solids for the backs and bindings for all but one of the wedding attendant quilts and I used them in the I Do quilt I am working on for Matt. I also used some solid orange (leftover from Matt's I Do quilt) for some of the blocks I made for Rainbow Around the Block. Kona Solids come in a huge variety of colors (221 colors right now!), are nice quality,  extremely versatile, and reasonably priced.  I used a birthday gift certificate from my Dad and step-mom Laurie to pick up a few of the new-ish Kona Solid fat quarter bundles from the Fat Quarter Shop (discount code from RetailMeNot.com) in pink, purple, and green:

Aren't they cute?! I am planning on using the pink in my girly guest bedroom, the purple in my more masculine guest bedroom, and the green in the master bedroom. I also picked up some Kona solid charms and a jelly roll at the Missouri Star Quilt Company when I won their YouTube.com gift certificate giveaway.
In addition to the fat quarter bundles and pre-cuts, I also recently bought a Kona color card. I had such a hard time finding one in stock somewhere but finally managed to snag the last one from Purl Soho.
This card is perfect for me because I do most of my fabric shopping online. Now I will be able to buy matching solid coordinates for my quilts without having to worry so much about the color on the screen being different in person (that happened with the I Do quilt for Matt). I literally scoured the internet trying to find this card. They are not in stock anywhere at the moment but in addition to PurlSoho.com where I bought mine,  I also saw them on Etsy.com, Hancocks-Paducah.com and PinkChalkFabrics.com. All of these places said they have the cards on order and they will be shipping soon. In my opinion this is a must have tool for anyone who wants to incorporate solids into their stash.

Check out Kona solids at your local JoAnn's or call your local quilt shop to see if they carry any. I think you'll agree after you use them that they are a really nice option to have in your stash. I will let you know how well it works to have the color card around once I've had a chance to use it more. I think it's going to be a really awesome tool!

Happy Quilting!
Saturday, July 31, 2010

Love Pinwheels - Part 4

Last night I worked on creating some additional pinwheels for my Love Pinwheels quilt and I feel like I made a lot of progress!

I had some yardage left over from the Love fat quarter set I bought at Fabric.com with a coupon I found on RetailMeNot.com and some Bella Solid charms in white leftover from my purchase at the Missouri Star Quilt Company. The yardage I had leftover from each fat quarter was just enough to cut a 5" strip which I used to cut 4 5x5 charms and 2 2.5" strips leaving me a 2.5-3" strip and a little selvage piece. I think I am going to make myself a selvage pincushion with some of those scraps and save the larger pieces for an accent pillow in my guest bedroom

I've been using the Missouri Star Quilt Company tutorial on pinwheels for this project.. I got a lot of compliments on my pinwheels when I took a few in to my local quilt shop to get some additional yardage in white for the sashing.

Here are a couple of pictures of my latest:

Next I will add the borders in a coordinating Love print.

Happy Quilting!

Thursday, July 8, 2010

How to Resize an Embedded Video

I was recently inspired to share a trick on embedding and resizing videos in blog posts and I thought I would share for anyone interested in doing the same. 

Most of you are probably familiar with YouTube.com but if not, check it out. I have found all sorts of free video tutorials for quilting techniques, sewing clothing, editing photos, etc. I have noticed that sometimes embedded videos don't exactly fit in the "body" area of a blog web page and hang over into the sidebar or "gadget" area. This is based on the type of template you are using on your blog and the size of the tables the template is coded for.

For example, this is the video the Missouri Star Quilt Company posted on YouTube to announce a giveaway which I won! However, the default size of the video exceeds the width of the content area of my blog. I would really like to re-design my blog so that I better utilize the space but that is a project for another day. For now, I just resize the embedded video! Here it is directly from YouTube:


Wow...that's a big video! It totally covers up my sidebar area where you can see my previous posts, followers, flicker photos, etc. and I really don't want that so I am going to resize it. There are a couple of different ways to do this. You can copy the embed code directly from YouTube and paste it into the body of your post. When you do this you will see the HTML text and you can edit it from there. The code starts with something like this:

object width="640" height="385"

That little bit of code defines the size of the video but it's not the only culprit. Towards the end of that code you will see that the width and height are defined again. To change the size of the video you will need to change the values in both places. I changed this video so that the width is 400 and the height is 285:


Much better right? You can play around with these numbers a bit and preview your post to see how it will look to get just the right size for your post on your blog. However, be careful to only replace the numbers in the code and to not remove any of the spaces or punctuation because they are both part of the HTML "language" and without them your code will be "broken". If you accidentally do this, delete the entire bit of code for the video (not the text you have written though--that should still be ok), paste a fresh version, and make your changes. Simple right?

If you don't see the code text (you will probably see your embedded video there instead) there is another way to see and edit it. You'll notice as you are creating a Blogger post (I am not sure about other blogs) that there are two tabs above the area where you type: "Edit HTML" and "Compose". Blogger is set up to automatically start you on the Compose tab but as you write text, make certain words bold, change the font, etc. you are actually writing HTML. Blogger automatically "writes" the HTML for you as you type but you can see the HTML code at any time by clicking the Edit HTML tab. Click over to the Edit HTML tab, look for the section where your video is embedded, change the values from that screen, and then switch back over to the Compose tab. It's that easy!

Hopefully this information will be helpful to you. I use Blogger but I know there are other blog hosting sites out there that are likely set up very differently. If you have a question about how to do this on the blog host you use just send me an email and I will do my best to help you figure it out.

Now go out there and resize some embedded videos!

UPDATE: I have checked this post out on a couple of different computers and realized that in some cases, the video doesn't "hang" over the content area. Instead, part of the video display is hidden. You can tell if this is the case if any of the 4 sides of the video aren't visible.