Monday, October 10, 2011

Quilted Paperback Book Cover - Part 2


PART 2
This post is a continuation of

Welcome back quilters who also enjoy reading books, particularly paperback books. Today I'll be explaining how to measure your book to determine what cuts you'll need to make.

I purchased this book used, and it already had a little damage to it. The cover was starting to break away from the bound pages and there's clearly some wear and tear.
I used rubber cement to glue the cover back to the pages and secured the book with some fabric strips I found in my trash around all the edges to keep everything nice and tight while the glue dried. My librarian friend suggested rubber bands but I couldn't find any so I improvised. I am sure there's information out on the web on how to repair books so go research if your book is already falling apart.

Let everything dry.

Now that your new or used book is in as good condition as possible, we can measure it and start making our cuts.

First, measure the short side of the cover:

I recorded this measurement as 4". It's definitely OK to approximate within 1/8".

Second, measure the long side of the cover:
I recorded this measurement as 6.5".

Third, measure the depth of the book:
I recorded this measurement as 1.5".

I draw out my measurements like so:
This shows the cover as a 2 dimensional object so I can add up all the parts and pieces.

I then add 1.5" to my total length and 1.5" to my total width. My new measurements are 8"x11" (previously 6.5"x9.5"). Your measurements may be different from mine so we'll now call the length A and the width B.

The next key measurement to record is the width of the pockets. You get this measurement by taking the length of the short side of the cover (4") and subtract 1/2". My new measurement is 3.5". Your measurement may be different from mine so we'll now call the pocket width C.

The finished sized pieces you need are as follows:
  • One A"xB" rectangle for the outside of the cover
  • One A"xB" rectangle for the inside of the cover
  • Two C"xA" rectangles for the outside of the pocket
  • Two C"xA" rectangles for the inside of the pocket
  • One approximately A+1"xB+1" rectangle of batting for the cover (slightly bigger than your fabric cuts to trim with scissors later)
  • Two approximately C+1"xA+1" rectangles of batting for the pockets (slightly bigger than your fabric cuts to trim with scissors later)
How you get to these fabric cuts is completely up to you!

You can be scrappy, paper piece, English paper piece, make blocks, applique, or cut all of your pieces from a single cut of fabric. In this tutorial I go into details for using 2 fat quarters but feel free to personalize the cover and the outside of the pockets to your hearts content. I will say that there's not much use in piecing the inside of the pockets or the inside of the cover as they are the parts of the cover which will come into direct contact with the book and should be as smooth as possible. Plan to cut those pieces from a single cut of fabric.

Fat Quarter Method
This method works for mass market sized paper back books but not for the 'Opra' sized. You need slightly more fabric for the larger books.
I received an adorable fat quarter set of Lizzy House's 1001 Peeps line as a thank you for pre-ordering her book. Thanks Lizzy!

I pulled the print out with all the peeps and paired it with a print from Anna Maria Horner's Innocent Crush line

Fold your fat quarter along the short side of the fabric so that you are cutting along the long side of the fabric
Cut at A (for me this was 8")

Open the cut you just made and cut B (for me this was 11")
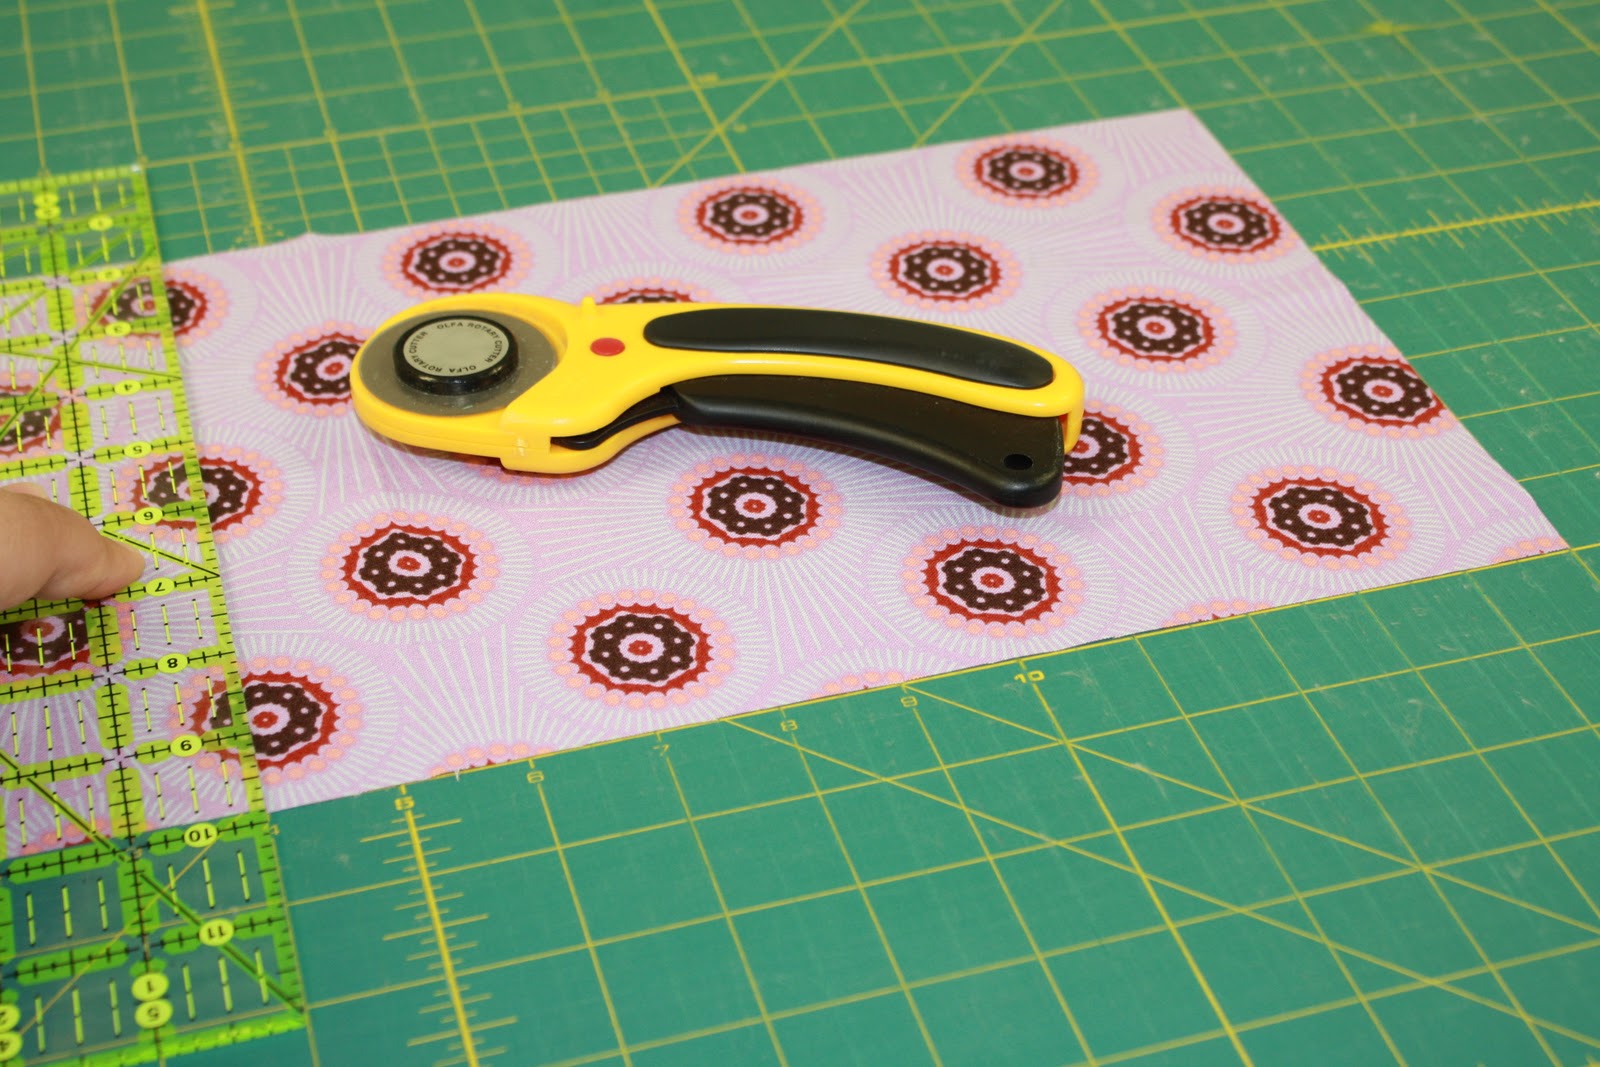
From the same piece of fabric, cut two Cs (for me this was 3.5")
You should now have 3 cuts and a little piece for your scrap pile
Repeat these steps for the Cover (AxB) and two outside pocket pieces (CxA).

A word of caution, if you are using a directional fabric, make sure your cuts are going in the right direction and modify steps accordingly!

To cut my batting, I laid my pieces out on my batting and trimmed around


Tomorrow we will be learning how to sew all of the pieces we just cut together. You homework is to get all of those pieces ready and make any repairs necessary to your book!


Happy Quilting

Sunday, October 9, 2011

Quilted Paperback Book Cover Tutorial - Part 1

 PART 1

One day there was a girl who loved to read. She read, and read nearly every night before bed. One day, the girl's friend let her borrow a book he thought she would like. She liked it so much, she read it twice! But by the time she was done...the book was falling apart. See, the book her friend loaned her was made with a flimsy cover and as she read, the paper became worn and broken.
The girl was so distraught. She was ashamed to return the borrowed book to her friend in such a sad condition. She vowed never to read books with flimsy covers again.

A few years later, the girl found a book she was so excited to read, but the only kind available to buy was made with a flimsy cover. What was the girl to do? She tried to think of a way to protect the book as she read, and an idea was inspired! She thought, 'what if I made a cover for the book while I read? Something more sturdy, something pretty....'

And that, ladies and gentlemen, is how I came up with the idea to make a quilted book covers for all the paperback books I read. True story. Not a very well written one, but I'm a quilter, not an author!

My idea has come a long way from the original:
I discovered it was neither efficient or useful to bind the cover or the pockets. The bulk created by the extra layer actually caused the cover to become misshapen and that was something I was trying to avoid in the first place.

Instead, I found a way to create the cover using only my machine (no hand-sewing down the binding) and sew all of the pieces together so that all of the unfinished edges are pocketed within the interior of the cover. I found a way to use scraps, yardage, pre-cuts, anything I can imagine really, that is still adaptable to any size book. I originally stumbled on this method when I was trying to use scraps from a quilt, use batting scraps for a challenge I tried to host on my blog, avoid hand sewing at all costs, and speed up the process. You can read all about it and a few more details about the book that started it all here.
 
I would like to take the time to say that I did not copy or get ideas from any patterns created by other quilters. While it's possible my method may be similar, it was developed over time through my own trial and error. I would also like to ask that this tutorial be used for personal use only; it should not be used for profit. Thanks in advance! 

So now that you've heard my story, and decided you want a paperback book cover of your very own, let me tell you what supplies you will need...

A 3/8" foot. Your cover will be pieced with this foot!

A paperback book of your choosing:
Some fabric of your choice (at minimum 2 fat quarters but scraps, pre-cuts, or yardage will work too):
Batting or batting Scraps:
Thread (I often just use neutral thread but any thread will do):

Optional supplies include Perle thread:
 Embellishments or piecing supplies:
Tomorrow we will be getting our book ready, taking measurements, and cutting the fabric pieces to make our cover. Your homework is to collect your materials and pick out the book you are going to make a cover for!

Happy Quilting!

Saturday, October 8, 2011

New Tutorial

Get ready......


...it's coming!

Wednesday, October 5, 2011

I can't believe...

I can't believe it's already 11somthing am...

I can't believe it's already Wednesday...


I can't believe it's already October...

Where does the time go? 


Just to give a quick update since it's been so long since I've blogged...

  • We became God parents to our beautiful niece Sophie Lee. She is adorable. 
  • I bought some necklaces at Allora Handmade. I love them. 
  • I've had some major health issues which have affected both my free time and my mental state, in good ways and bad. I would tell you about what's going on but the end result is pretty sad and I don't want to bring everyone down. I'm OK. I'm feeling better. No need to worry.
  • I went to Mexico with my wonderful husband to recover from said health issues. We stayed at a luxury All Inclusive (<--check it out!). It was fabulous. We didn't ride on any jet skis. 
  • Before leaving for Mexico, I dropped my Bernina 1260 for routine servicing. I still don't have it back. I miss it. 
  • I've been using my old Brother ($99 Target special) while my machine is in the shop. It doesn't sew as nicely as my Bernina so I am avoiding doing anything important with it including the Rainbow I Spy blocks. I have made a couple of book covers for some new paperbacks I bought. I will put up some pictures when I am done embroidering them and I have plans for a tutorial after the Rainbow I Spy block drive is done. Other than that, I haven't been machine sewing.
  • I've been passing the time by working on a couple hand-sewn hexagon projects. One will probably take years (queen sized quilt made from 1" hexagons) and one will probably take a couple months (8 place mats made from 2" hexagons). I will eventually show pictures of both. I've been delighted by all the Rainbow I Spy packages I've received. Opening the mailbox has been so much fun. You can still make and turn in blocks all through this month. I've been working on bundling the blocks I have received so that they will be ready when I get my Bernina back. 
  • I have been watching quite a bit of TV including new shows New Girl, Free Agents, Up All Night, Secret Circle, Terra Nova, old favorites Parenthood, Modern Family, The Sing Off, SNL, Chelsea Lately, Community, Glee, and I am looking forward to the season premieres of House, Bones, Game of Thrones, True Blood, and Cougar Town. I am sure I am missing some of my shows. I have a lot of shows. At least I sew while I watch so I'm not just a couch potato. 
  • I have been reading a lot. I am currently reading The Help. I have read so many books lately that I'm having trouble remembering them all individually but they include: Guilty Pleasures, The Laughing Corpse, Circus of the Damned, A Game of Thrones, A Clash of Kings, A Storm of Swords (audiobook in progress), Captivated, Entranced, Charmed, Enchanted, Heaven is For Real, and Dark Predator.
  • We are painting our Family Room and getting some new shelves for all my books. I can't decide between Gold and Toast. 
  • I have plans to make some new drapery for the family room. I picked out a fabric with blue Greek keys on a white-ish background. I have no idea how to make drapes.
  • Hopefully I will have some pictures to share soon.
I think that about sums everything up. Thanks for continuing to check my blog despite my absence!

Happy Quilting

Thursday, September 1, 2011

Rainbow I Spy - In Search Of...

Happy September 1st everyone! I'm not sure about where you live, but where I live in Virginia it's already noticeable that the season is changing. It's a little cooler, the sun is a little different, and the days are getting noticeably shorter. Fall is coming!

I've had some people ask me what colors I'm low on for the Rainbow I Spy block drive. Really, the answer is 'all'. I will gratefully accept block donations in any color! This drive is going on until October 30th and I'm hoping to be able to donate at least 20 Rainbow I Spy quilts to the NICU. That being said, there are a few colors I am low on right now so if you're looking for specifics, you can make a block or two in one of these colors:


There are 9 blocks to each quilt so even if I do 1 block from every color in ROY G BIV (red, orange, yellow, green, blue, indigo, violet) I still need 1 more color to make the quilt top work. Colors like coral, magenta, teal, aqua, and pink are great for this!

I do seem to have plenty of red, orange, light pink, and lime at the moment but that can always change once I start getting more blocks in.

Thank you to everyone who has donated so far. I have 2 quilt tops done and 5 more partial tops that need a few filler blocks. That's about 70 blocks donated so far which is incredible!! If we keep up this momentum, we will be on track to complete my goal of donating 20 quilts by the October 30th deadline.

For anyone just joining, make sure to check out these posts for all the details:

Rainbow I Spy Block Drive
do. Good Stitches {A Charity Bee} August Project - Rainbow I Spy

And don't forget to add photos of your blocks to the Threaded Mess Flickr group! You may just see your blocks featured in one of my posts if you do...


Happy Quilting!