Friday, June 18, 2010
Rainbow Around the Block
I was checking out different blogs today and stumbled on Ana Maria Horner's blog. I haven't bought any of her books yet but I have purchased some of the fabric she designed. She is leading efforts to donate quilt blocks for families who lost their homes and belongings during the flooding that happened in Middle Tennessee in May 2010. I think this is a really neat idea and I am going to try to make a few blocks to donate. If you are interested you should check out her blog or her page for the Rainbow Around the Block donation effort.


My First Model
When I first started sewing I had grand ideas of making children's clothing to sell online or in a boutique. Since I work full time and only craft on the side, it really isn't possible for me to sew full time. Plus, I am just starting out and I have a lot to learn before I can "go pro". Before I came to this realization, I asked a friend if I could use his daughter to model my clothes and take pictures. I don't have children of my own yet and my niece and nephews are 1-4 hours away. I paid him with one of my dresses and his wife seemed to be really happy about that so I think this arrangement worked out for everyone. I was cleaning up files on my computer tonight and came across my pictures from that day. So here are a few photos from that picturesque day in Fairfax, VA:


Thursday, June 17, 2010
The Process Pledge
Also....
I officially took The Process Pledge today. I think I am doing an ok job of explaining what I did for each of my projects but you can leave a comment if you want more info on something and as part of the pledge I promise to TRY to post more about what's going on in my head when I am working on a project or thinking about working on a project.
I officially took The Process Pledge today. I think I am doing an ok job of explaining what I did for each of my projects but you can leave a comment if you want more info on something and as part of the pledge I promise to TRY to post more about what's going on in my head when I am working on a project or thinking about working on a project.
Howdy Neighbor
Matt and I recently bought a townhouse. I know...we're crazy. The right time for us just happened to coincide with us planning for a wedding/honeymoon, me changing groups within my company, and me doing a lot of DIY projects for the wedding and wedding attendants. I will post about these projects once I get some pictures...
With all the commotion, we didn't really get a chance to introduce ourselves to our neighbors. One of our neighbors was kind enough to make us some welcome-to-the-neighborhood sweets but couldn't give them to us because we were gone for our wedding/honeymoon. I didn't want to waste the opportunity to reciprocate the hospitality so I decided I would make her a little something for her home. I decided to go with coasters but I have never made them before so I just sort of winged it. I know there are probably patterns out there but I am really bad about following directions! So here's what I did:
Step 1: Operation Find Turtle Fabric
I will admit that in the short period of time that I have been sewing (about 2 years now) I have accumulated a great deal of fabric. I finally pulled everything back out of the storage containers I used for the move and couldn't believe my eyes. I have no idea where I used to put it all! My neighbor has a turtle so my first idea was to make coasters with turtles on them. I actually have a fabric that I bought to make something for my friend's little nephew but never got around to doing. I thought this would be too easy and decided instead that I could cut turtles made from different fabrics that would look something like this:

My problem was that I didn't have fabrics that matched that also had enough contrast to give me the look I thought I was going for. I mulled my idea some more while having a delicious rum and coke and suddenly realized that I didn't need to literally make turtles...I could make essence of turtles! I already had several green Amy Butler strips leftover from a project I did for my sister out and knew from working on the wedding attendant quilts (I used Bali Pops which are basically jelly rolls) that I could sew the strips together and then cut squares from my "rail fence". My second idea looked something like this except with awesome Amy Butler Midwest Modern green fabrics:

I went with a bright green leftover from the I Do quilt I made for Matt on the back of the coaster which didn't really match perfectly but I decided to go for it rather than go and buy more fabric. I ended up getting 6 5x5 squares from my rail fence. Here's where it gets a little fishy...
Step 2: Operation What the Heck do I Fill this Thing With?
I am still not sure I made the right choice but hopefully I can get some feedback from my neighbor to see how these hold up. I decided to use this thick stuff called Peltex by Pellon that I had leftover from making place mats from my kitchen. I didn't really like this stuff for the place mats because it was too thick and when you bend Peltex it looks wrinkled but I thought for a coaster the rigidity and thickness would be nice. I also cut some poly/cotton batting leftover from the black, red, and white quilt I made my dad and step-mom for Christmas to go on the side that will face up so that any wrinkles from bending the coasters wouldn't show as much and to give the coasters more dimension after I quilted them.
I cut the Peltex and the batting 4.5x4.5 so that I would have a quarter of an inch on each side of my square for a seam. Having now completed this project I realize that this really wasn't enough room to close the coaster on the 4th side. If I do this again I will make 5x5.5 rectangles for my front and back fabric with 4.5x4.5 squares for the filling so that I have a little extra room to close the coaster the 4th side. Since I had already cut my fabric, ironed on the Peltex, and sewed the first coaster on 3 sides before I came to this conclusion I just decided to do the best with what I had and hand sew any funky spots. It was also at this point that I realized I wasn't paying attention to what the color of my bobbin thread would look like with my back fabric. My bobbin thread was a dark green color which really stands out from the bright green. If I was a better quilter this probably would be really neat but since I am not it looks...off. The Peltex has 1 side with an adhesive similar to the iron-on interfacing you would use to applique something. It feels more gritty on the side with adhesive. I have this cool sheet made from (I think) Teflon for appliqueing so I used this over the the Peltex as I ironed it on to the back of my bottom fabric in case I accidentally started ironing the wrong side. This is what my fabric for the back of the coaster looked like:

Step 3: Sew it all Together...
So at this point I had my top fabric, my back fabric with Peltex attached, batting squares, and my new-to-me Bernina. Thanks to my new Aunt-in-Law Ginny I am now the proud owner of a BerninaBernina so I use it when I travel to sew somewhere. I put my coaster top fabric and back fabric right sides together and sewed them together on 3 sides using a 1/4 inch seam with the Peltex facing me so I could use it as a guide. I then put my batting square on top of my Peltex and flipped the coaster right-side-out so that the right sides of my top and back fabric were showing and the Peltex and batting were stuffed inside. Finally, I tucked the back piece of the fabric over the Peltex and batting on the inside of my coaster and folded the edge of the top fabric over so that the unfinished edge was on the inside too. I sewed a few stitches over from the edge of the coaster on all 4 sides starting with the open side. This allowed me to close my unfinished end and hide the fact that the end was unfinished because all 4 sides looked the same.
Step 4: If You Quilt Them They will be Quilted
I now had 6 coasters sewed on all 4 sides but I wanted to quilt them to give them extra texture and dimension and so that the fabric wouldn't look distorted when it gets wet from drinks. I decided to try a couple of different styles so I could pick a favorite for the next time I make them. I made 2 of each of these 3 styles:

I think my favorite is the lines going across the square for this project because I did them in the same direction as the strips on the top of the coaster. I also could have stippled them but I liked the idea of doing something very linear since the strips that make the top fabric are very linear.
Step 5: Take Pictures!
Shoot....where is my camera...found it! Quick upload to computer....failed attempt at making the photos look better (just got Photoshop Elements and have no clue how to use it yet)....ok here we go:


Tuesday, June 15, 2010
Matt and Natalie Get Married!
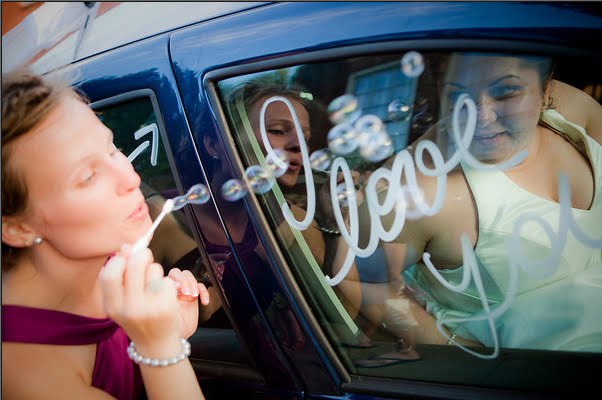
Matt and I got married May 29th and we couldn't be happier! I am working on a special series of posts showing off the quilts I made for the wedding party with the help of my mother-in-law Ann, aunt-in-law Ginny, and their friend Donna. Ann made us a beautiful wedding quilt (see first and last picture) as a surprise so be looking for that as well. For now check out a few of the pictures from our special day...


nu=32+5%29+%285%29+78%29WSNRCG%3D345798776932%3Bnu0mrj.jpg)


I made the flower girl dress, the favors, the save the date cards and invitations (save the date and invitations not pictured) as well as lap quilts for all 10 attendants. Matt's dad made the cupcake stand that we used at the reception and Matt's mom made us the wedding start quilt. The Guest Book was purchased from Emerson Bindery (formerly UberArt) on Etsy. The cupcakes were made by one of the teachers at my mom's school and she also decorated the cupcake stand. The pearls are fresh water pearls from Hong Kong that my dad and step-mom gave me years ago, the diamond earrings are a gift from my grandmother Bia who is no longer with us, and the necklace is a handmade gift from my grandmother Pat. Our wedding had so many personal touches and it really was a magical day for us.
Thanks for letting me share!
Photos taken by
Sam Dean
http://deansam.smugmug.com/
samdeanphotography.com
samdeanphotography@gmail.com
Amy Graybill
http://amygraybillphotography.com/ (the portrait of me with my head tilted to the right after the vase with my flowers in it)
Pat Marcum
http://www.rubylane.com/shop/tisajewelrydesigns
(the picture of the necklace)
Uber Art
http://uberart.etsy.com
(the picture of the guest book closed)


nu=32+5%29+%285%29+78%29WSNRCG%3D345798776932%3Bnu0mrj.jpg)


I made the flower girl dress, the favors, the save the date cards and invitations (save the date and invitations not pictured) as well as lap quilts for all 10 attendants. Matt's dad made the cupcake stand that we used at the reception and Matt's mom made us the wedding start quilt. The Guest Book was purchased from Emerson Bindery (formerly UberArt) on Etsy. The cupcakes were made by one of the teachers at my mom's school and she also decorated the cupcake stand. The pearls are fresh water pearls from Hong Kong that my dad and step-mom gave me years ago, the diamond earrings are a gift from my grandmother Bia who is no longer with us, and the necklace is a handmade gift from my grandmother Pat. Our wedding had so many personal touches and it really was a magical day for us.
Thanks for letting me share!
Photos taken by
Sam Dean
http://deansam.smugmug.com/
samdeanphotography.com
samdeanphotography@gmail.com
Amy Graybill
http://amygraybillphotography.com/ (the portrait of me with my head tilted to the right after the vase with my flowers in it)
Pat Marcum
http://www.rubylane.com/shop/tisajewelrydesigns
(the picture of the necklace)
Uber Art
http://uberart.etsy.com
(the picture of the guest book closed)
Subscribe to:
Posts (Atom)