Tuesday, August 31, 2010

Thoughts of Red and Aqua Running Through my Head

I have so many projects piling up in my head and no time to sew. Work has been consuming my evenings and weekends, and what I haven't spent working I have spent organizing and cleaning. I can't seem to get red and aqua triangles out of my mind...

Or how I am going to put my love pinwheel blocks together. I have been going back and forth about what color I want to use for the sashing and I think I've finally figured out a solution! I was really hoping to tie more pink into my quilt so it would coordinate better with my girly guest bedroom bedding. I put a fat quarter of Kona Petal up on my design wall and love how it is just slightly lighter than the pink in my bedding but I think overall it's too much color. I thought about it some more and came up with a plan that still brings in the pink but leaves most of the sashing white:


What do you think? A little pop of pink, color variation throughout, and mellowed by the white sashing. I can see it working really well but that means I have a lot more sewing and cutting to do...

I'd really like to make myself some clothes that can transition into fall like this Museum Tunic from Anna Maria Horner's website or the Anna tunic by Amy Butler! It would be so nice to have all the time in the world for these projects but alas, I have to make money to pay for them...back to work for me!

Happy Quilting!

Monday, August 30, 2010

Miss You!

Lately work has been taking over my life. This is a self portrait of me right now...

"MORE WORK?! zug... zug..." as my RTS playing husband would say...

Happy Quilting!

Monday, August 23, 2010

I Bought City Quilts!!!

I am still working on giving my blog a makeover. Thank you for your patience while I work on it! What do you think of the fish? They are almost too cute for words and I love feeding them but I am worried they might make the page load slower.

I also decided to finally move out all of my stuff from my "cave" in the basement and set up shop in my dining room upstairs (it was empty) so that we can repaint the walls down there. Currently the walls are painted in this awful greenish tan color and the paint has a texture almost like sand paper. I am sure someone crazy like Hildi from Trading Spaces thought it would be an awesome idea to put sand in paint and sell it (obviously others agree because they buy it) but I for one and not a fan at all. We're going to get rid of the texture somehow and repaint the walls in a color that gets my creative juices flowing.

I love my new set up in the dining room so much! I will have to come up with something similar or better when I go back downstairs so that I don't miss it. One of the coolest things about the new work area is that I was able to set up two work stations so friends can come over and sew too!

Come on over friends! I'll pop open a bottle of wine or mix you a rum and coke!

Today's big news is that I finally bought a copy of City Quilts. In honor of their 400th (5 posts ago) blog post, they are giving away a free pattern of your choice when you order the book! I chose to get The Tempest as my free pattern because I couldn't resist the purple! Go check out Cherry House Quilts!
from the Cherry House Quilts web shop
Happy Quilting!

Thursday, August 19, 2010

Blog Face Lift

I've decided my blog really needs a face lift so to speak, a makeover if you will. Please excuse the in-progress mess!

Wednesday, August 18, 2010

Batting Scrap Challenge - Project 2

A few weeks ago I started a challenge project to use batting scraps as inspiration for a project or two. I thought it would be creatively inspiring to think outside of the box and turn trash into treasure. So far no one has decided to join my challenge that I am aware of. If I am wrong let me know! Leave a comment on any batting scrap challenge post and let me know what you're up to.

I mentioned in the original post that there would be perks involved for those who decide to participate. I've decided to give away at least one of my batting scrap challenge projects to a lucky winner. To win, you must join in the challenge fun! Each project you complete with batting scraps will earn you a chance at winning one of mine. Go to the Batting Scrap Challenge page and leave a comment saying you're going to join in the fun and follow the challenge instructions.

My first project was a nifty book cover perfect for mass market paperback books:
Tonight I made another book cover from scraps of fabric and batting. The fabrics on the front of the cover are leftovers from Matt's I Do quilt and the batting and solid fabric on the inside of the cover are from one of the wedding attendant quilts (ignore the lint lol):


I also made a new pin cushion from Amy Butler Love selvages leftover from my Love Pinwheels quilt:

I was trying to make something with piping like this pincushion:
By Cindy at aroundtheblockdesigns.blogspot.com
But....I had to cut the piping off....it was bad. I had a lot of fun working with selvages though! I find it fascinating that something I've always thought should be thrown away can look so cool.

The pincushion and second book cover will also be up for grabs for a lucky winner of the Batting Scrap Challenge so get started on your own projects for your chance to win. Every project you share will be a chance to win any of my projects!

Happy Quilting!

Tuesday, August 17, 2010

Onesies for Baby Benjamin

I have the hardest time coming up with cute ideas for boys but my sister has two little boys (Coleman and Benjamin) so I thought I would try. I haven't made much for them yet like I have for baby Gracyn. I found these onesies at Walmart for $1.50 and thought they would be the perfect canvas for some baby boy themed appliques for Benjamin who is 10 months old.

Shirt 1: Wool Lobster Applique
My sister actually requested this one. I went with a more cutesy design rather than realistic. The red is a piece of wool blend fabric and I ran a satin stitch all the way around the edges.

Shirt 2: Batting Scrap Star Applique
This one is probably my least favorite. I couldn't figure out what I wanted to put on this one. I couldn't get past the little stars on the onesie! So I just did a shooting star design but to me it looks girly. The dark blue star is actually a bit of batting/backing scrap from one of the wedding attendant quilts! I did a satin stitch around the star (intentional) and the lighter blue pieces (unintentional because I forgot to change my thread). I think the satin stitch around the lighter blue pieces looks heavy but it was late and I wasn't thinking clearly...I would take it out but I think taking it out will probably make holes in the knit fabric and will look weird.

UPDATE: I did take this applique off. It did make holes but I think there's still hope. I am re-working it so that it's not so girly and so that you can't see any holes from the outside or inside. I'll update when I'm done. 

Shirt 3: Zoo Buddies Applique
I have no idea what print this is (if you know please feel free to leave it in the comment section) but I thought the little animals were cute. I got a scrap of this in a scrap pack I ordered on Etsy awhile back. I just cut around them so some of the brown background of the fabric would outline the colorful circles and ran a blanket stitch all the way around both. The monkey is appliqued on with red and the rhino is appliqued on with green.

Shirt 4: Elephant Applique
I free handed all of these and it is most apparent with this elephant. I think it looks pretty good all in all. I ran a straight stitch in a light blue thread all of the way around. It needs a little something though so I think I am going to ask a friend if she can embroider "Ee" in the middle of the elephant.

So there you go, my first attempt at machine applique for a little boy. What is your favorite boy sewing project?

Monday, August 16, 2010

Project Modern

I just found out from Alissa at Handmade by Alissa that the Modern Quilt Guild is launching a modern quilting challenge!  Project Modern!
Project Modern!
According to Alissa there will be some truly great judges and prizes are involved.   Even a Janome Horizon 7700!!  Check it out Project Modern on the Modern Quilt Guild website!

Happy Quilting!

Friday, August 13, 2010

I Heart Kona Solids

The other day I went to my local quilt shop and asked if they carried solids to which they responded "uh no" in a judging way that made me feel like I had just broken some quilting law or committed a major quilting faux pas. Well, as it turned out, they did have some solids in neutral tones of white, snow, cream, bone, toffee, brown, black, etc. I picked up some Kona Solid white because I was planning to use it for my Love Pinwheel quilt and didn't let them convince me I needed a tone-on tone instead. I love solids! In fact, one of the first quilts that caught my eye when I first started looking around was this quilt:
picture from dioramarama.com. more pictures on this flickr page
I love the mixture of colors and simple, yet (in my opinion) stunning design. In my opinion solids are far from boring! I am a big fan of Cherry House Quilts and just love the new book, City Quilts. I still haven't picked it up because I thought I might be getting it as a gift for my birthday but didn't so I will be picking it up soon! This one from the City Quilts book is called City lights:
on the Cherry House Quilts blog

It really reminds me of a sky scrapper! I really love this quilt called The Tempest. I remember her first post about this quilt where she described how she was trying to get a good shot of it down by the water but in the process of backing up on the dock to get the photo just right, she fell into the water! That definitely sounds like something I would do. Don't worry, she was ok and so was the quilt. Purple is probably my favorite color (it's really hard for me to pick just one color) and this quilt sings to me.
on the Cherry House Quilts blog
Even though solids are frowned upon by more traditional quilters (and apparently my local quilt shop), they are very popular among modern quilters alone or in combination with modern prints. For example:
from apartmenttherapy.com
from amyscreativeside.com
from filminthefridge.com
from handmadebyalissa.com
from ohfransson.com
I used Kona Solids for the backs and bindings for all but one of the wedding attendant quilts and I used them in the I Do quilt I am working on for Matt. I also used some solid orange (leftover from Matt's I Do quilt) for some of the blocks I made for Rainbow Around the Block. Kona Solids come in a huge variety of colors (221 colors right now!), are nice quality,  extremely versatile, and reasonably priced.  I used a birthday gift certificate from my Dad and step-mom Laurie to pick up a few of the new-ish Kona Solid fat quarter bundles from the Fat Quarter Shop (discount code from RetailMeNot.com) in pink, purple, and green:

Aren't they cute?! I am planning on using the pink in my girly guest bedroom, the purple in my more masculine guest bedroom, and the green in the master bedroom. I also picked up some Kona solid charms and a jelly roll at the Missouri Star Quilt Company when I won their YouTube.com gift certificate giveaway.
In addition to the fat quarter bundles and pre-cuts, I also recently bought a Kona color card. I had such a hard time finding one in stock somewhere but finally managed to snag the last one from Purl Soho.
This card is perfect for me because I do most of my fabric shopping online. Now I will be able to buy matching solid coordinates for my quilts without having to worry so much about the color on the screen being different in person (that happened with the I Do quilt for Matt). I literally scoured the internet trying to find this card. They are not in stock anywhere at the moment but in addition to PurlSoho.com where I bought mine,  I also saw them on Etsy.com, Hancocks-Paducah.com and PinkChalkFabrics.com. All of these places said they have the cards on order and they will be shipping soon. In my opinion this is a must have tool for anyone who wants to incorporate solids into their stash.

Check out Kona solids at your local JoAnn's or call your local quilt shop to see if they carry any. I think you'll agree after you use them that they are a really nice option to have in your stash. I will let you know how well it works to have the color card around once I've had a chance to use it more. I think it's going to be a really awesome tool!

Happy Quilting!

Tuesday, August 10, 2010

A Bit O' Shine Giveaway Sponsored by Lovie and Boo

Check out Molly at A Bit' O Shine today for a chance to win earrings from my Etsy store Lovie and Boo!

A few weeks ago, I shipped these beauties off to Molly:
To go with this outfit Molly refashioned from thrifty finds:
I love the way she combined the slate, mushroom, and cream together in this outfit with little feminine touches. Those sleeves look great on the hanger but I am sure they look even better on, and I love those rosettes!


Molly was kind enough to let me sponsor a giveaway on her blog so go check it out for all the details! You will have a chance to win:
Bethany's Fashionista Cover Button Earrings in Cherry and Sky Blue
Or you might win:
Bethany's Fashionista Cover Button Earrings in Cherry Saffron and Oat
They both go perfectly with this bracelet you can find in my shop:
Bethany's Fashionista Cover Button Bracelet
While you're over there checking out the giveaway, check out her blog and become a follower if you like what you see. I love her recent post about cheering up her house with flowers! What a nice way to make the house smell nice and feel more homey. I also really enjoyed her Unbirthday Mad Tea Party post! She's so creative!

Molly also has an awesome Etsy shop called Molly the Pirate's Bit O' Shine where she sells all sorts of vintage, steampunk, and contemporary jewelry.

I love these earrings by Molly:
Black Diamond crystal rivoli earrings
And these by Molly:
Underwater Petroglyphs glass earrings with a watery glow
Thanks for reading, go check Molly out, and good luck!

Monday, August 9, 2010

How would your life be better with a serger?

Sew, Mama, Sew is currently hosting a giveaway for a Husqvarna Viking Serger s21 ($1199 retail value)! So cool!!!

How would my life be better with a serger?....


This post started out very differently. I started to tell you how much fun I have had making clothing with my serger for friends and family and the projects I had in store. I started to tell you about me returning my MIL Ann's serger to her after borrowing it for almost a year. But when it comes down to it, the items I can make with a serger are merely a means to an end. What I really love about owning a serger is what I love about owning a sewing machine: I LOVE seeing the look on the faces of my friends and family when I give them something meaningful and personal that I have made with my own hands. I love seeing their eyes light up with joy and happiness. It makes me very happy and I feel very proud of myself. So how would my life be better? Well, I'd be able to expand what I am able to do with a serger (because the model I have been using is pretty basic - plus I have to give it back this weekend), which will lead to me using it more and more to make gifts for people, which will lead to eyes lighting up with joy and happiness, which will lead to me be even happier and even more proud of myself!

I know, I know...pretty sappy. But so true for me!

If you're still interested in seeing some of the projects I made with Ann's serger keep reading. If not, know that I am crossing my fingers and hoping that I'll be the winner!

Happy Quilting!

This pillowcase made from Joel Dewberry Orange Damask and Almond and Orange Sparrow prints from the Aviary collection modeled by baby Gabby:
This pillowcase dress made from Sandi Henderson Spring Playful Paisley and Turquoise Henna Garden prints from t he Farmer's Market collection:
This garden dress made from Alexander Henry Blakely print from the Fashionista collection and a blue and white polka dot fabric I haven't been able to identify (it was a kit from Oh So Sassy):
This pillowcase dress I made for Gracyn from Amy Butler Lotus fabrics:

My brother's girlfriend Samantha asked if I could make her nieces matching outfits with a butterfly theme. One of my purchases during the big Westminster sale at Fabric.com I posted about  was several yards of these Del Hi prints by Valori Wells:
This will be my first project on my new serger! They are going to be so cute!

Thanks for stopping by so I could share with you!

Happy Quilting!

Thursday, August 5, 2010

Batting Scrap Challenge - Project 1

Hello everyone!

If you haven't already checked out this post about the Batting Scrap Challenge, go check it out!

Ok, now that you're back I'll show you what I've been up to tonight.

First, some background info: I love to read and prefer hardcovers because I DESTROY paperbacks. I learned this the hard way when I borrowed The Da Vinci Code from my friend Nick. By the time I was done with his book it was scratched, worn away, water marked, and bent to the point that I was embarrassed to return it to him. And I was being careful!


From that point forward I swore off paperbacks and stuck to buying hardcovers. One day I found this book (hardcover), Dark Celebration, in a bargain bin at Borders for $3 and got totally hooked. The story is about a race of people (Carpathians) similar to humans but with super strength, speed, ability to shape shift, and other supernatural powers who become vampires if they don't find their soul mates, and have to hunt their brethren who succumb to the temptation of power and lust for killing. I had no clue the book I picked up was #14 of a 20+ book series still being written and that most of the books are only available as mass market paperbacks. That's how they get you with those bargain books! They hook you into a series!

I liked the first book so much I decided to buy a couple more from the beginning of the series. When they arrived from Amazon I decided to make a quilted book cover to keep myself from destroying them. My first attempt was pretty lame. I took some Amy Butler Midwest Modern fat quarters in my stash and some Amy Butler Midwest Modern scraps from a blue and green quilted nursing cover I made my sister and (without a pattern) made myself a cover that would work for a mass market paperback. I found out first hand why it's better to use a mitered binding rather than sewing the strips together in a straight line (very bulky). I also made the mistake of using minky fabric for the binding on the book sleeves (I don't really know why I thought this would be a good idea) so they ended up more bulky than I would have liked but the book cover worked for my purpose so I was pretty happy.

Since that first book cover I have tried to perfect the process. I think the quickest method so far was to just buy fabric already quilted from my local JoAnn Fabrics! JoAnn.com seems to be down right now but check out this link at Fabric.com to see what I am talking about. The only problem with that method is you have to bind the edges of the sleeves, bind the cover, and hand sew the bindings to the back which adds more time to the process.

Tonight I tried something a little different. I wanted to avoid hand sewing if at all possible so as I constructed my book cover I kept in mind how it needed to be sewn together to ensure no hand sewing was necessary. I used scraps from Maura's Strata Square quilt made from Bali Pop in Kiwiberry. The scraps were teeeeeeeny tinnnnnny leftovers:


Which I sorted and combined to form a piece I could use for the outside of my book cover:

I ironed as I pieced:
And kept adding and adding:

Until I had a rectangle big enough for the cover:
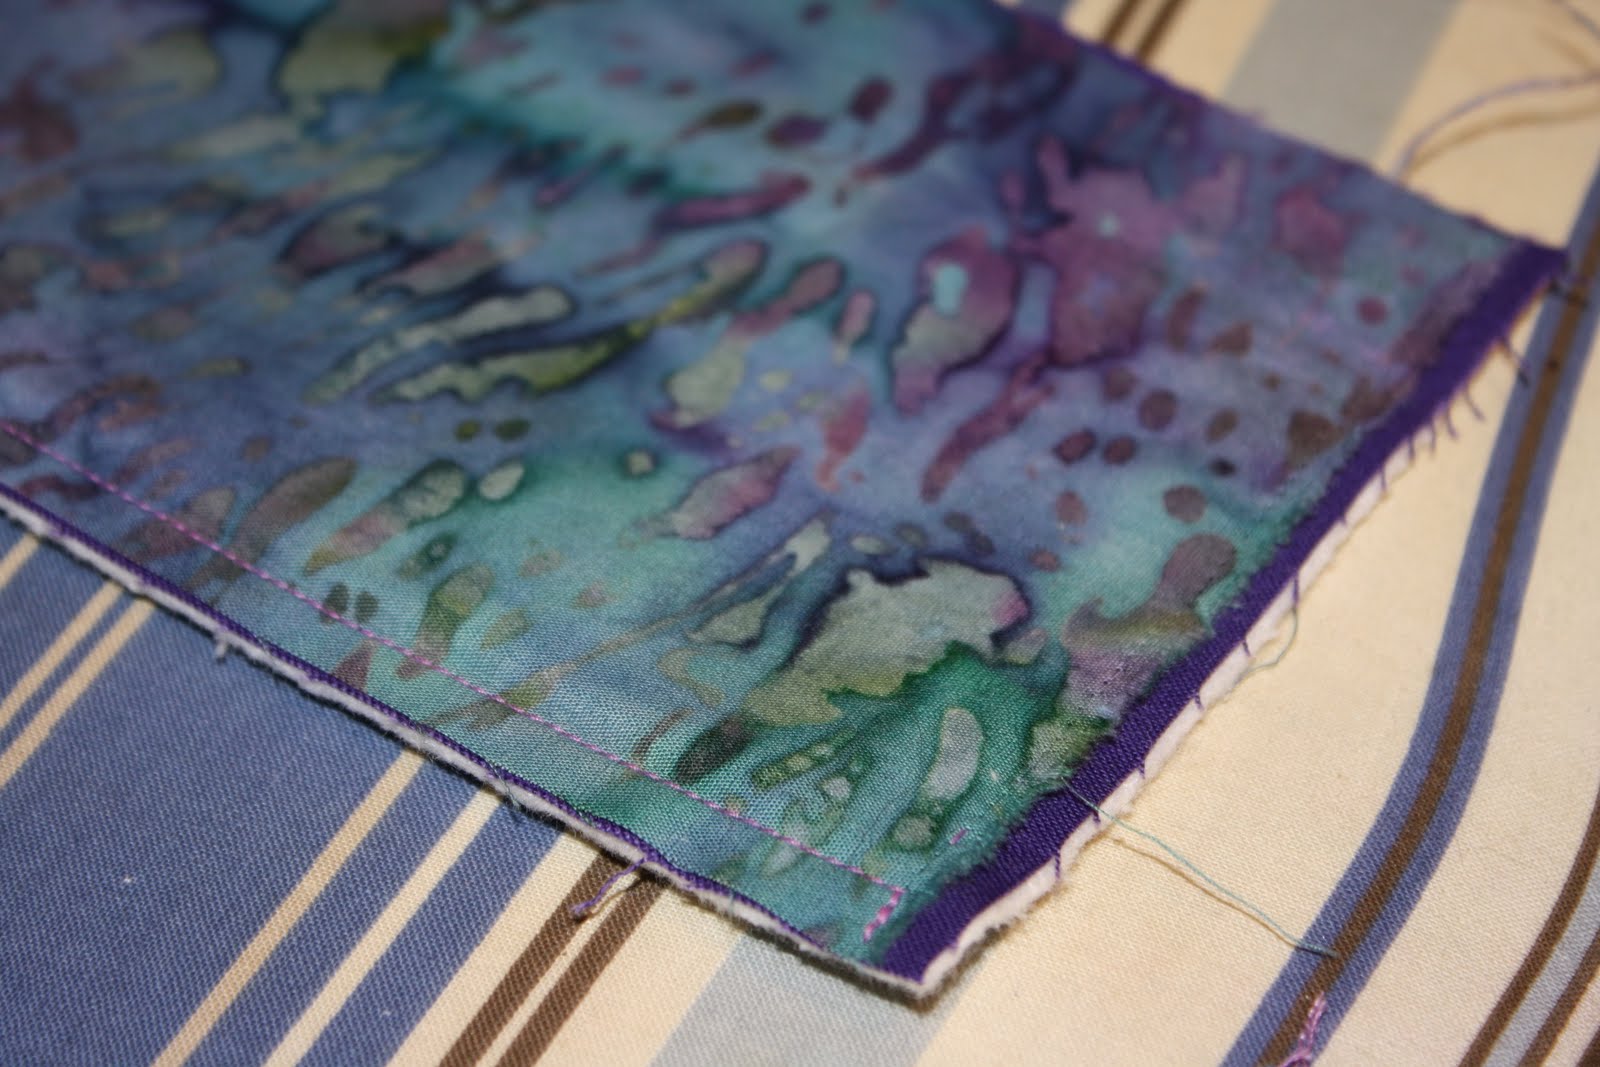
I found another scrap of a purple and blue fabric (from the batik bundle Ginny gave me for Christmas--thanks again Ginny!) that was the perfect size for the inside and the sleeves:
I pulled out some batting scraps from the wedding attendant quilts (I think this was from Maura's too):
Cut some for the sleeves and the cover and started sewing keeping in mind that I wanted all my unfinished edges to end up inside the cover:
Once I had the sleeves done I arranged them, the inside fabric, batting, and outside fabric and pinned them with safety pins:
I sewed around the edges leaving myself about 2 inches to turn it right side out, pressed it, sewed about 1/8 of an inch all the way around to close the hole I left myself, and then quilted down the middle to fix some of the odd fitting scraps I used (totally quilted it out lol):
And presto change-o, a book cover:
I am still perfecting this process so until I do I am not going to do an official tutorial but I hope this project has inspired you to go get your binding scraps and make something totally awesome! I'm signing off for the evening to go do some reading using my new book cover. Thanks for letting me share with you!

Happy Quilting!