Wednesday, June 29, 2011

Playing with Publisher

I've always wondered what my blocks for do. Good Stitches or A Dozen Quilters might look like as a finished quilt. Today I discovered how to use MS Publisher to do just that! Here are some of my creations...

Chartreuse and Raspberry Quilt Mock Up

Courthouse Steps Quilt Mock Up

Apple in a Basket Mock Up

Pink and Purple Log Cabin Mock Up

Spinning Crosses Mock Up

I've never thought of using this program in this way before, but now I think I will use it to test out blocks before I commit to making a whole quilt. I'm also thinking about making some of them into business cards for myself.

To make my mock ups I simply opened my pictures within MS Publisher and squared up my blocks. Then the fun began! I twisted them and flipped them until I had a pattern I liked and then I copied that pattern until I had a whole virtual quilt. I grouped all the blocks together and saved them as .png files so I can play around with them more in the future.

Happy (virtual) Quilting!

Saturday, June 25, 2011

do. Good Stitches {A Charity Bee} - "Hope" June Blocks

My June do.Good Stitches blocks for the Hope group are done.

do. Good Stitches {A Charity Bee} June Blocks

do. Good Stitches {A Charity Bee} June Blocks

do. Good Stitches {A Charity Bee} June Blocks

Check out this post if you want the details on June's project.

Happy Quilting

Tuesday, June 21, 2011

Marshmallow Brochette - Backing and Basting

Hello fellow QALers! This week I'm posting on backing and basting your quilt. If you're not quite there yet, no problem! Just keep chugging along and let me know if you run into any snags. I would love it if you posted pictures of your progress in the Marshmallow Brochette flickr group.

Before I get in to the next set of instructions, I just want to say how excited that you all are embarking on this journey with me. It's so...COOL (for lack of a better word right now) that there are those of you out there who liked my pattern enough that they wanted to make it, AND wanted to make it so much that they are participating in this quilt along.

Marshmallow Brochette QAL Group Progress

The above pictures were all added to the Marshmallow Brochette QAL flickr group by those of you participating. If I didn't include at least one of your pictures it's because it doesn't appear in the group or isn't sharable. I have really enjoyed following your progress and commenting on your pictures!

On to the instructions...

Well...sort of. This isn't a tutorial on creating your backing or basting. There are some great ones out there so if you need some assistance please google search for tutorials or check out youtube.

If you need to refer back to the supplies list for how much fabric you need for either the mini quilt or lap quilt, check out the first Marshmallow Brochette QAL post.

Step 1: Press your quilt top and trim any excess

IMG_5866

Boyish Mini Quilt

Step 2: Press your backing fabric. I don't have a picture of me actually pressing my backing fabric but here is one OF the backing fabric: *wink*

IMG_5872

Step 3: Make your quilt sandwich. I generally use a bit of masking tape to keep my backing fabric taut, 100% cotton batting, and safety pins to baste.

Boyish Mini Quilt

Basting is my least favorite part of the quilting process. If you feel the same, trudge through.We're in the home stretch!

Step 4: Shake off your quilt and get ready for quilting next week. I like to keep my quilts hanging or laying flat to avoid getting wrinkles before I am ready to quilt.

Happy Quilting!

Wednesday, June 15, 2011

Marshmallow Brochette QAL - Part 3.2

Hello Threaded Mess followers and Marshmallow Brochette QALers!

This weekend did not go as planned, nor did the start of this week. It's funny how life sometimes works out that way. Hopefully to some this delay of schedule is giving you the extra time you needed to do something else...

Without further ado, here are my measurements for each column of the lap size version of Marshmallow Brochette (exact cuts for the mini quilt were already provided):

By column my measurements were (from top to bottom piece):

**All of these measurements are for the size you CUT. The finished size will be smaller because of your 1/4" seam allowance**

Column A (left): 4" [square] 7" [square] 5" [square] 4" [square] 6" [square] 8" [square] 8" = 42"

Column B: 6" [square] 5" [square] 3" [square] 7" [square] 9" [square] 5" [square] 7" = 42"

Column C: 3" [square] 7" [square] 9" [square] 6" [square] 4" [square] 8" [square] 5" = 42

Column D: 5" [square] 5" [square] 5" [square] 7" [square] 6" [square] 6" [square] 8" = 42" 

Column E: 7 [square] 5" [square] 9" [square] 4" [square] 4" [square] 6" [square] 7" = 42"

Column F (right): 5" [square] 9" [square] 7" [square] 3" [square] 4" [square] 8" [square] 6" = 42"

For visual people, this is not to scale but here is how the cuts lay out:

According to Excel, this should give a nice wavy look that is part of the Marshmallow Brochette charm:


**All of these measurements are for the size you CUT. The finished size will be smaller because of your 1/4" seam allowance**

How is everyone coming along? I'd love to see pictures in the Marshmallow Brochette QAL flickr group!

Happy Quilting

Saturday, June 11, 2011

Catching Up

It's getting late so this will be a quick post. I'm slowly but surely catching up on all my commitments and that feels pretty good! I wish I wasn't so late on these but that's the way life goes sometimes I suppose.

do. Good Stitches {A Charity Bee}: May Blocks

tches {A Charity Bee} May Block 2

do. Good Stitches {A Charity Bee} May Block 1

tches {A Charity Bee} May Blocks

A Dozen Quilters: May and June Pillowcase Dresses

A Dozen Quilters Pillowcase Dresses

A Dozen Quilters Pillowcase Dresses

And finally, though I didn't take a picture, I did package up the giveaway prize for my 101 Followers giveaway.

Everything has been packaged up and is ready for the post office tomorrow.

Packages Ready to Send

One last picture because I couldn't resist! My Lovie and Boo, Matt and Lucy:

Matt and Lucy

A boy and his dog? Or a dog and her boy? Either way, this makes me smile.

Happy Quilting

Friday, June 10, 2011

Inspired: True Green

May's do. Good Stitches {A Charity Bee}'s project in the Hope group is a sampler quilt using 'true green' (not pastel) with touches of white, gray, and black.


Images from Toast and Tables, Jennifer Skog, Popular Interior Design, Graphics, and DecoCouture

This is a bold color combination and I really like the energy! It is a naturally occurring combo (kiwi, green apples), and can either be casual or formal depending on the patterns and use of colors. This combination can be feminine or masculine which I think is really nice because it's tough finding fabric combinations that work for guys.

What fabrics you might ask? Today's fabrics were all found at fabricworm.com. Unfortunately I couldn't make a mosaic because they have opted out. I'm not sure why...it's free advertising right? Oh well, here are a few of my favorites in this colorway:

fabricworm
fabricworm
fabricworm

fabricworm

fabricworm

fabricworm

fabricworm

If you're looking to pick up a few fat quarters, fabricworm.com already has a stash builder stack ready to go:

fabricworm

I found some great projects on flicker.com in this colorway:

Inspired: True Green

Check out the blocks that have been made so far by the ladies of do.Good Stitches for our May project:

do. Good Stitches: True Green in May

I tried but I couldn't include all of the pictures so check out the do.Good Stitches photostream to see more.

Happy Quilting

Wednesday, June 8, 2011

News and Updates - Catching Up

Thank you to everyone who responded about the QAL! I promise to catch up but your understanding is appreciated. The good news is we really are in the home stretch! and I WILL catch up!

We DID find a car to replace my Mazda so I can cross that off my list. I love our new Pilot and can't wait to take it on a trip!

I finished binding the two quilts for Ava. Unfortunately I didn't have enough blocks for two quilts made from purple wonky star blocks but I had just enough to make one. As it turned out, I liked all the blocks that were turned in better together than I did separately so it all worked out in the end. For the second quilt, I made a strip quilt from my stash and here's a sneak peak:

Strip Quilt for Ava

Which will be bound in this:

IMG_6166

Here's a picture of the purple wonky star blocks before I pieced them:

IMG_6066

I will post some more pictures once I upload them from my camera. Both quilts are on their way to Pennsylvania to meet Ava.

Do. Good Stitches is off to a great start this month. I designed a Chartreuse and Raspberry Spiderweb quilt and some of the girls have already started making blocks:

By Muriel

IMG_5409
By Hollie

do. Good Stitches - June
By Jeni

do. Good Stitches - June
By Jeni
I'm really looking forward to working with these blocks!

We had a nice weekend down at the lake with family to celebrate our 1st Anniversary. Most of our family members were there with us and that was really special. I took a bunch of photos but these are my favorites.
My Nieces and Nephews
My nieces and nephews. We got to babysit the girls last weekend and had a blast at the park and nearby festival.
IMG_6108
My honey
Alissa and her Boys
My sister and her boys

Sophie and Maria
My niece loved Princess Maria (the puppy)
I have one of the sweetest friends a girl could have. Waiting in my mail for me the other day was a surprise package from Hollie.
Surprise from Hollie
I gushed over the fabric Hollie selected for her commissioned wonky star quilt. It's such a perfect fabric for binding and I love the color. When Hollie returned to her LQS to get some more for herself she bought an extra yard for me. Isn't she sweet?!
Surprise from Hollie
Hollie's gift was so thoughtful and the timing of her surprise couldn't have been any better because I was having a really tough day. I can't wait to use this fabric! Thank you Hollie! You're the sweetest!

Matt's sister graduated in May from Appalachian State University:
Maura's Graduation 5-7-2011
Maura and Ann

Maura's Graduation 5-7-2011
Matt, Me, Maura, Al, Carly, and Mark

Maura's Graduation 5-7-2011
Scott and Maura


That about wraps up all the updates I have for now. I still need to catch up on May and June do. Good Stitches blocks, A Dozen Quilters May and June Pillow Case Dresses (already sewn, just need to take pictures), do. Good Sitches Wonky Cross Quilt, update everyone on my exact cuts for the Lap size quilt in the Marshmallow Brochette QAL, and hopefully get another Inspired post out to you all.

I can't believe it's already June 8th. Where did May go? 

Happy Quilting

Sunday, June 5, 2011

Marshmallow Brochette QAL-Part 3

First off, I am so sorry for this huge delay in posting. We went on vacation for Memorial Day, then we celebrated our anniversary, then I had to work really late for work for a few days, then my car for real died, then I had to go to the Baltimore, MD, area to babysit my nieces, then we had to try to buy a new car which was an unsuccessful disaster. Lesson learned: write all posts and schedule them for posting next time I do a QAL instead of writing as I go. Hopefully you all are hanging in there and aren't too mad at me about the delay. I am a little mad, but hopefully YOU aren't. That would break my heart.

I have to be honest about something else: I'm still playing catch-up for the QAL...can you believe that?! Late for my own project. Gahhh. So hopefully this week, I will be catching up to where you all are but I will go ahead and give you the next set of instructions.

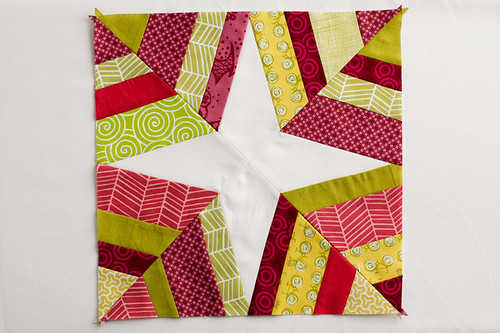
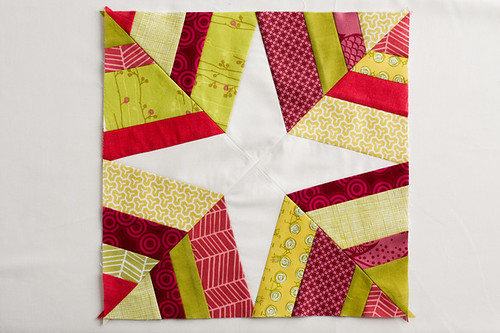
Mini Quilt Instructions can also be found in the original post on the Fat Quarterly.
 
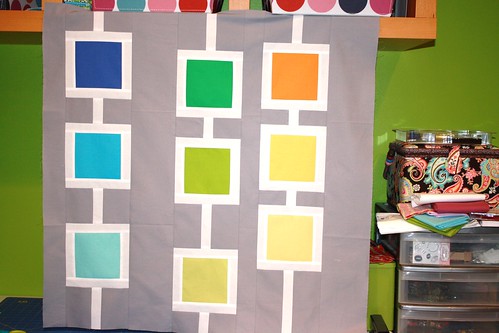
Laying Out Your Quilt:

IMG_5856

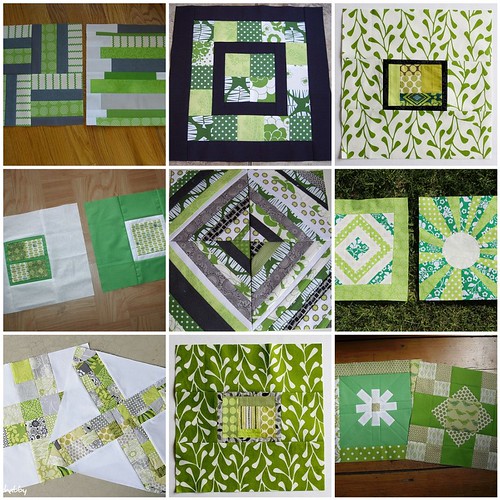
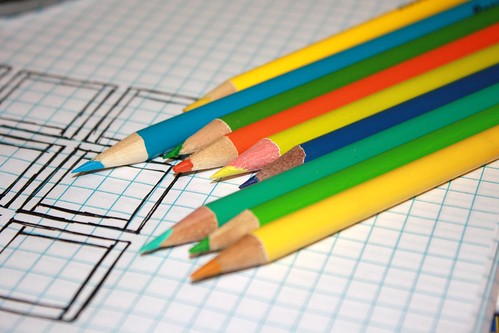
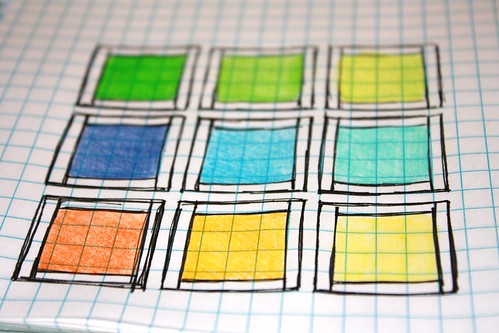
I’m a visual person and it helps me to draw things out so I used colored pencils and graph paper to draw my strips and squares:

IMG_5857

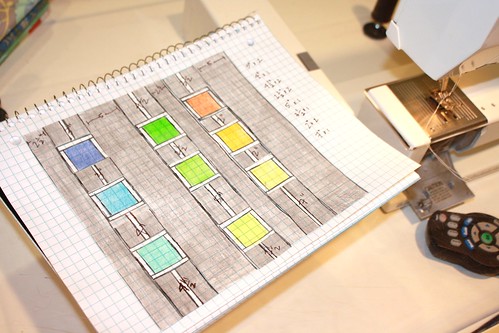
Then I laid them out and taped them down the way I planned to sew them.

IMG_5861

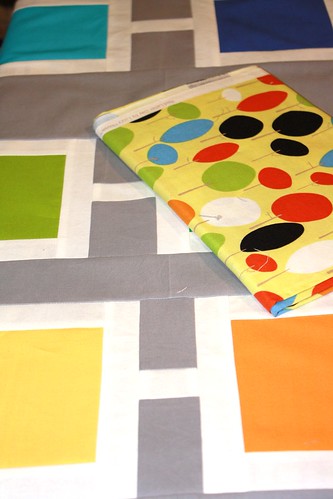
For the Mini Quilt, the goal is to cut 4 pieces from your connecting strip (the piece you created from the two 3.25" background fabrics and one 1.5" connecting strip) for each of your 3 columns (12 total) so that each set of four pieces adds up to 14 1/2″.

I was able to cut all my pieces from 1 finished strip but if you are working with smaller widths of fabrics you may have to make a couple of these.

If you decided to play around with the placement of your squares, follow your own notes. If you want to use the exact measurements I did you’ll need to cut the following pieces:

2″ – cut 2
2 1/2″ – cut 2
3″ – cut 2
3 1/2″ – cut 1
4″ – cut 1
4 1/2″ – cut 2
5″ – cut 1
7″ – cut 1

By column my measurements were (from top to bottom piece):

Column A (left): 3″ [square] 3″ [square] 4″ [square] 4 1/2″ = 14.5″
Column B (middle): 4 1/2″ [square] 2 1/2″ [square] 5″ [square] 2 1/2″ = 14.5″
Column C (right): 3 1/2″ [square] 2″ [square] 2″ [square] 7″ = 14.5″

Piece the sections you just cut to your squares in the order you wish them to be laid out on your quilt. Then piece your columns and strips together. Voila! Your quilt top is done.

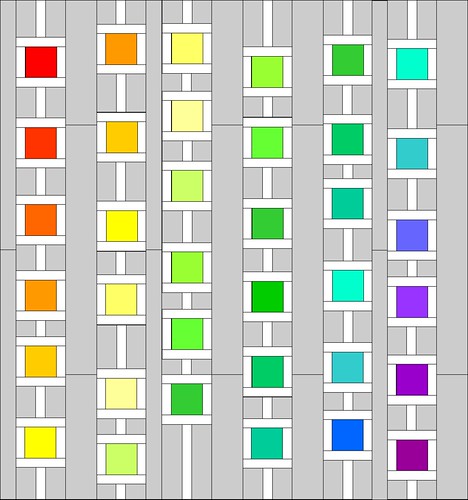
For the Lap Quilt, the goal is to cut 7 pieces from each of your connecting strips (the pieces you created from the two 3.25" background fabrics and one 1.5" connecting strips) for each of your 6 columns (42 total) so that each set of seven pieces adds up to 42″. It will take one connecting strip for each column (you should have made 6 of these per the previous instructions). The interesting part about this pattern is that the squares are randomly spaced in each column. Your goal will be to vary your cuts and placement of your cuts so that the squares are not in the exact same place in each column.


If anyone working on a lap quilt wants to wait until I have exact measurements, that's fine. If anyone wants to proceed and come up with their own measurements that's fine too! I will try and do a follow-up post with exact measurements for any who need that.

Have questions? Ask them on the Marshmallow Brochette Q&A discussion on flickr.

Happy Quilting

and sorry again!