 |
| my sister and SIL helping me because I forgot to put on my slip |
Tuesday, May 31, 2011
Marshmallow Brochette QAL
Hi all my QAL friends! I have been out of town celebrating Memorial Day with my family and my 1 year anniversary with my husband so I will be posting this week's QAL post a little late. I hope you don't mind!
Happy Quilting
Friday, May 27, 2011
Blogger Follower Gadget Issues
Looking for the Giveaway Post? Don't forget, I will randomly select a winner Thursday June 2nd at 7pm EST.
It seems Blogger is now having issues with the Follower Gadget. There is another way to follow me through Google friend connect and get another chance at winning the 101 Followers giveaway (if you aren't already connected). At the top of my page above the blog header that says 'Threaded Mess' there's a 'Follow' link. If you click that, you'll eventually show up on my blog as a follower when Blogger gets things straightened out.

Happy Quilting!
Inspired: Peony, Coral, and Silver
Today's inspiration palate comes from Lizzy B Loves blog. I recognized those Joyfolie shoes right away! The shades of peony and coral with touches of silver and toasted sugar creates a soft, girly, and glamorous look. While I can see this palate working really well in a project for a baby, it's sophisticated and elegant enough for a woman of any age.

What fabrics you might ask? Here are a few I found that work with this palate and style:

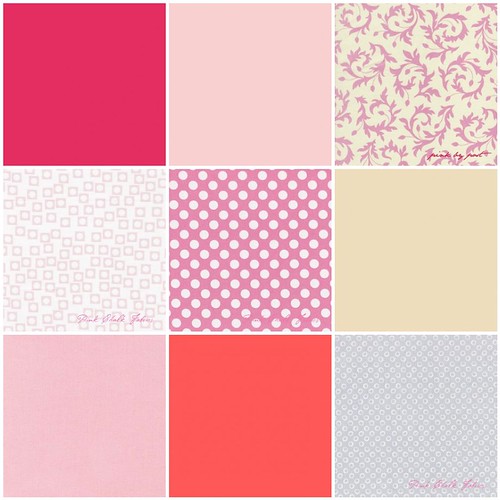
This week the fabrics were all found at Pink Chalk Fabrics
It was much harder to find handmade projects in this palate but I did find a few:
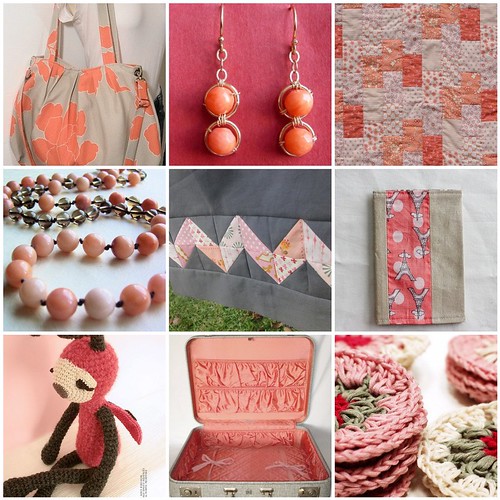
For more information for any of the fabrics or handmade items, just click on the picture and that will take you to my flickr photostream where you can find the links.
Have you made something in this palate? Leave a comment with a link to your creation so we can all check it out!
Happy Quilting

What fabrics you might ask? Here are a few I found that work with this palate and style:
This week the fabrics were all found at Pink Chalk Fabrics
It was much harder to find handmade projects in this palate but I did find a few:
For more information for any of the fabrics or handmade items, just click on the picture and that will take you to my flickr photostream where you can find the links.
Have you made something in this palate? Leave a comment with a link to your creation so we can all check it out!
Happy Quilting
Thursday, May 26, 2011
101 Readers! Let's Celebrate!!
Giveaway Closed! Thanks to all who entered!
Today, Threaded Mess reached a milestone I have been anticipating for days! According to Google Reader, 101 people read this blog. I'm honored, I'm excited, I'm thankful.
Today, Threaded Mess reached a milestone I have been anticipating for days! According to Google Reader, 101 people read this blog. I'm honored, I'm excited, I'm thankful.

STATS
Starting Date: About Me posted 4/16/2010
Total Posts: 150
Avg Posts per Month: 10.71
Avg Posts this Week: 4.4
Comments: 156
Page Views Last Month: 3,090
Total Page Views: 11,476
Most Visited Post this Month: Marshmallow Brochette QAL - Part 1 with 74 views
Most Visited Post to Date: I Heart Kona Solids with 306 views (Marshmallow Brochette QAL - Part 1 was in second place with a total of 303 views)
People who Read Threaded Mess are From: United States, Canada, Australia, Russia, Germany United Kingdom, Ukraine, Latvia, Netherlands, France, and Poland! (thanks tusen!)
To celebrate, I'd like to give you things. I wish I could give all 101 of you a little something but I know that will never work out. Instead, I'm going to give you a chance to win some of my favorites things, which also happen to be the ingredients for a Marshmallow Brochette lap quilt top! One lucky person will win:
1 yard of Kona White:

3 yards of Kona Medium Gray:

And a Kona Bright charm pack:

(I used pictures from the Fat Quarter Shop because that's where I bought these prizes. The Fat Quarter Shop is not sponsoring this giveaway but I do like shopping there!)
How to win:
1. Leave me a comment that you are a follower. Unfortunately there's no way for me to see who my RSS readers are, only how many I have. I know you are out there and I appreciate that! I can see all the people who follow me using Google friend connect:
On the right sidebar you'll see my Followers and a button to follow if you haven't already joined.

If you click the button you'll see this pop-up:

If you already have a Google, Twitter, or Yahoo account you can become a Threaded Mess follower and your profile picture will appear in my sidebar. If you don't have any of those accounts, it's pretty easy to sign up.
2. Leave me a comment that you've joined the Threaded Mess flickr group.
3. Leave a comment about something you liked on Threaded Mess and would like to see more of.
4. Blog about this giveaway and leave me a comment with the link.
****************************************************************
Please make sure for any comment you leave that you also provide a way for me to contact you!
I try to respond to as many comments as possible so if you have left a comment and haven't heard anything from me, you might be one of the No Reply Bloggers. How do you fix it? Go to your Dashboard on your Blogger.com account page. Select "Edit Profile" and check the box that says "Show my email address" (and remember to save your changes). It's that simple.
If you don't have a Blogger.com account and don't want bots to be able to find and exploit your email address, you can include it in your comment like this:
threadedmess (at) gmail (dot) com
If you don't have a Blogger.com account and don't want bots to be able to find and exploit your email address, you can include it in your comment like this:
threadedmess (at) gmail (dot) com
****************************************************************
I will randomly select a winner Thursday June 2nd at 7pm EST.
Thank you so much for reading my blog. Words cannot accurately describe how excited I am that I have reached this milestone thanks to you all. I hope that you continue to enjoy reading Threaded Mess in the future!
Happy Quilting
Wednesday, May 25, 2011
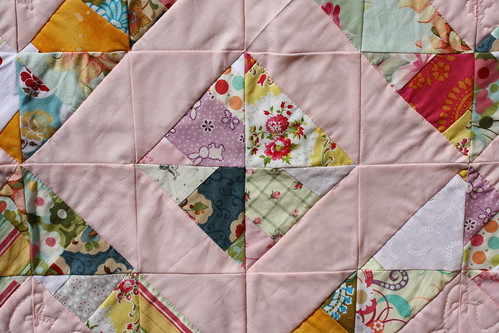
NOVA MQG Scrappy Preemie Challenge: Hearts
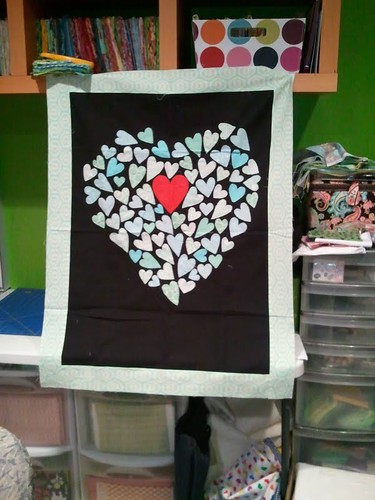
Sorry for the bad quality! I had to take this with my phone because my camera battery died last night.
My mini quilt was inspired by this quilt:
Which was inspired by this photo:

So I take no credit for the idea.
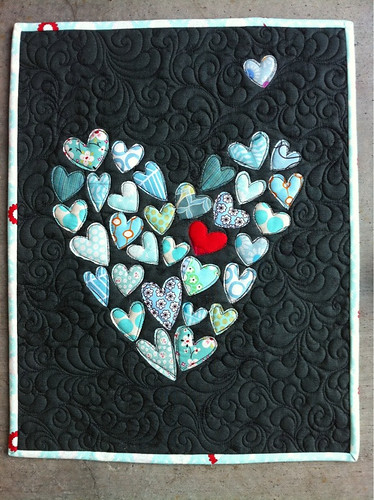
I did change it up a bit by making the hearts bigger, centering the red heart, adding a border, and making the whole quilt bigger.
Since this is a preemie quilt, I couldn't use synthetic fusible material to bond the hearts down to the background so I used a gel glue stick (not recommended by my local quilt shop but it did work for me without gumming up my machine) to lightly tack them down, and then I did either a straight stitch or blanket stitch to secure them. When I quilt it I will go over each heart again. My local quilt shop recommended I use a product specifically designed for machine quilting next time like this one at Heirloom Sewing for Children.
This quilt will be donated to the INOVA Fairfax Children's Hospital after this challenge round ends July 30th. You can read more about the challenge on the NOVA Modern Quilt Guild flickr page.
Happy Quilting!
Happy Quilting!
A Dozen Quilters Preemie Quilt Donations
I want to show off the lovely quilts I received from the ladies of A Dozen Quilters
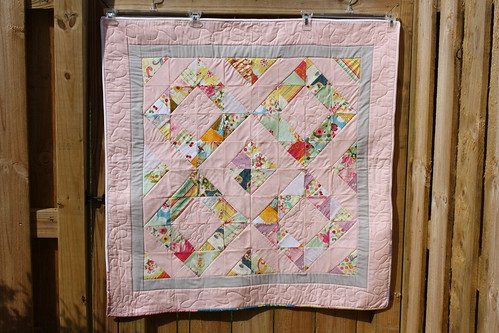
This quit top was donated by Christy and I finished it up by backing, quilting, and binding it:
This quilt was donated by Melissa:
This quilt was donated by Patty Z:

These quilts will be donated along with the rest of the NOVA Modern Quilt Guild quilts to the INOVA Fairfax Children's Hospital NICU. The NOVA Modern Quilt Guild is currently making Scrappy quilts to donate. If you would like to donate fabric, a quilt top, an unfinished quilt, or finished quilt we would be ecstatic to deliver your donation to the NICU. Just contact me and I will give you my mailing info. Please keep in mind that the quilts must follow the rules in this discussion post.
Thanks again ladies! They are beautiful!
Happy Quilting
This quit top was donated by Christy and I finished it up by backing, quilting, and binding it:
This quilt was donated by Melissa:
This quilt was donated by Patty Z:
These quilts will be donated along with the rest of the NOVA Modern Quilt Guild quilts to the INOVA Fairfax Children's Hospital NICU. The NOVA Modern Quilt Guild is currently making Scrappy quilts to donate. If you would like to donate fabric, a quilt top, an unfinished quilt, or finished quilt we would be ecstatic to deliver your donation to the NICU. Just contact me and I will give you my mailing info. Please keep in mind that the quilts must follow the rules in this discussion post.
Thanks again ladies! They are beautiful!
Happy Quilting
Tuesday, May 24, 2011
NOVA Modern Quilt Guild - Preemie Quilt Challenge 1 Photos
 |
| (I just downloaded this Shape Collage app from BigHugeLabs.com and love it!) |
There are too many pictures to show them individually but I hope you enjoy this slide show!


If for some reason this show isn't working please let me know. This is my first time trying imageloop out. All the images can be viewed at the NOVA Modern Quilt Guild flickr page.
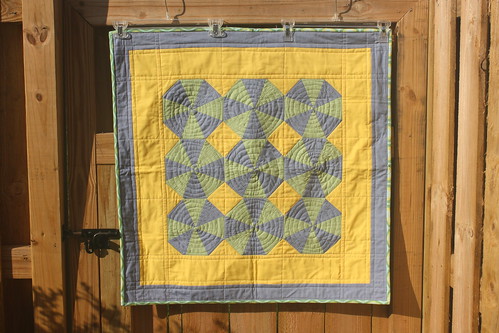
Robert Kaufman generously donated a charm pack for each member of participating chapters in the Modern Quilt Guild to use for a challenge project of our choosing.
The NOVA Modern Quilt Guild selected the Bright palate to work with and each of us made one or more mini quilts (29"x29" to 45"x45") from 100% cotton materials. The members were allowed to add fabric from their stash as long as the charms remained the stars of the show. The quilts will be donated to the INOVA Fairfax Children's Hospital NICU in Fairfax, VA.
If you are in the Northern Virginia area and would like to join our guild, check out NOVAModernQuiltGuild.com for more information and how to join. If you would like to donate fabric, a quilt top, partially finished quilt, or finished quilt made from 100% cotton materials, between 29"x29" and 45"x45" (rectangular or square), please contact me to coordinate your donation.
Thanks for stopping by!
Happy Quilting
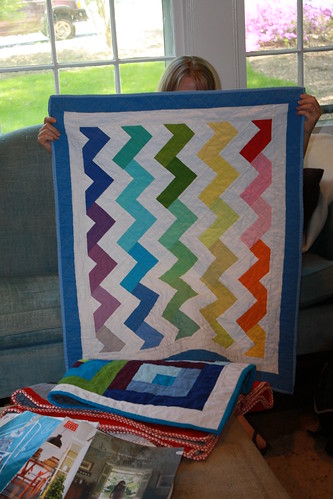
NOVA Modern Quilt Guild - Preemie Quilt Challenge 1: Show and Tell
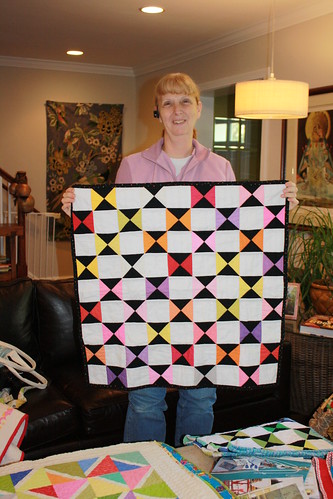
We had a great NOVA Modern Quilt Guild Show and Tell event April 30th at Rebecca's house. Everyone had a blast showing their creations and seeing the other quilts that were turned in ahead of time. Most of the quilts were created using Kona solid charm packs (in the bright colorway) which were generously donated by RK to all the modern quilt guilds. Here are some photos of the ladies holding their quilts...
More pictures of the other quilts our guild members made for this challenge to come...
Happy Quilting!
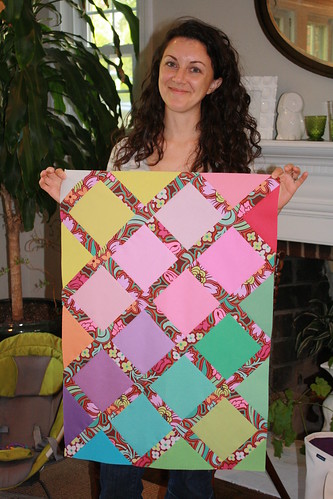 |
| Quilt top by Rebecca |
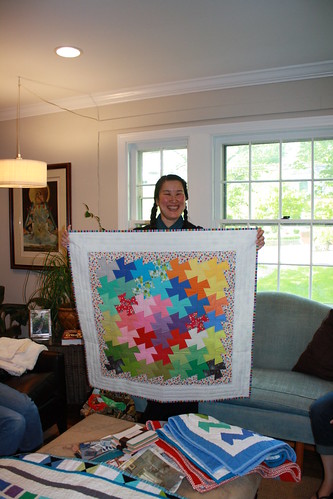 |
| Quilt by Miyoko |
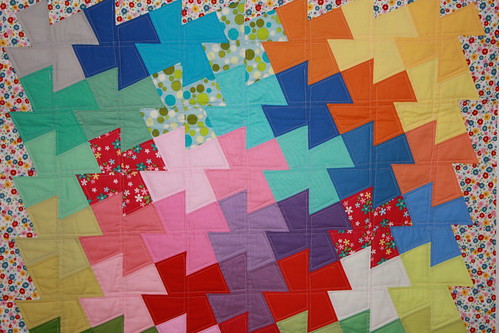 |
| Quilt by Miyoko |
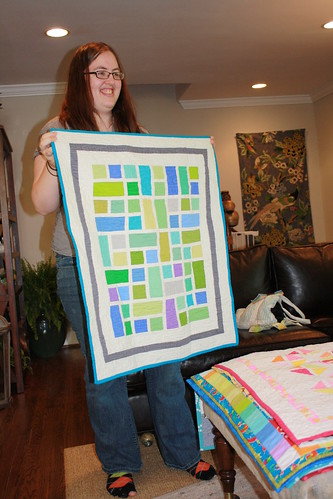 |
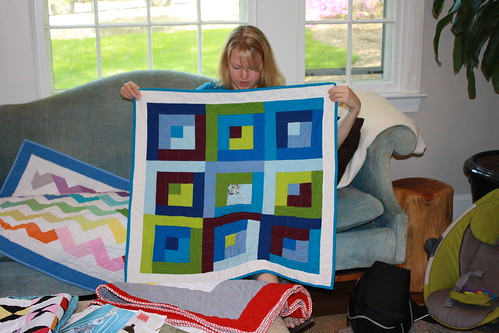
| Quilt by Kristy |
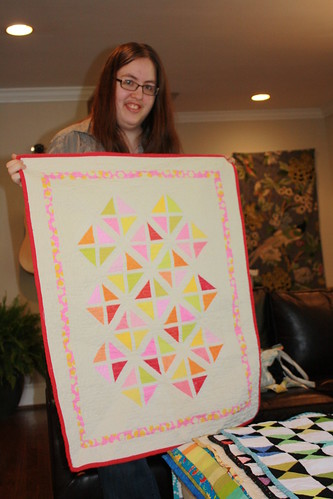 |
| Quilt by Kristy |
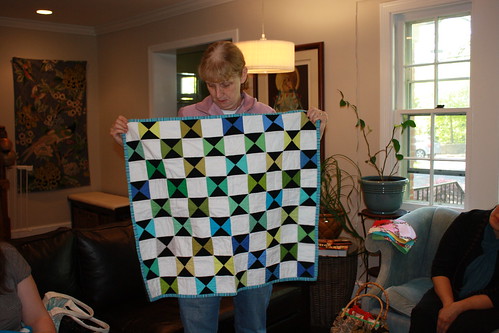 |
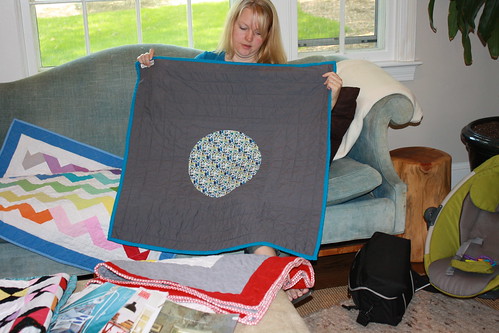
| Quilt by Sue |
 |
| Quilt by Sue |
 |
| Quilt by Sue |
 |
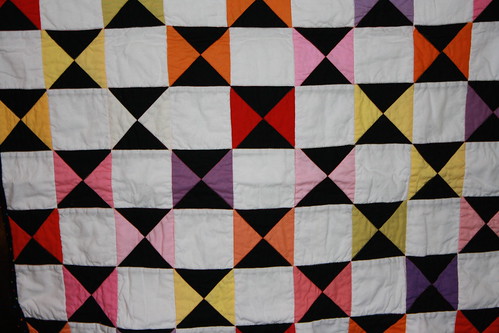
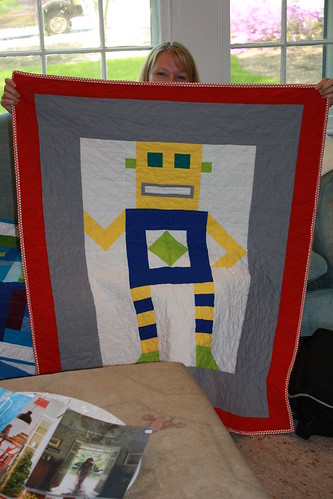
| Quilt by April |
 |
| Quilt by April |
 |
| Back of above quilt by April |
 |
| Quilt by April |
 |
| Back of above quilt by April |
More pictures of the other quilts our guild members made for this challenge to come...
Happy Quilting!
Monday, May 23, 2011
Marshmallow Brochette - Part 2.1: Bordering Your Squares
Hi QAL friends! I've gotten some questions on how to border the 5" squares with the 1.5" strips. When I pieced my borders and squares I followed these steps:
Step 1: Sew your square and strip together using a 1/4" seam. Make sure that the edge of the square and the edge of the strips line up as you guide your fabric under your machine. You can pin the pieces in place if you prefer.
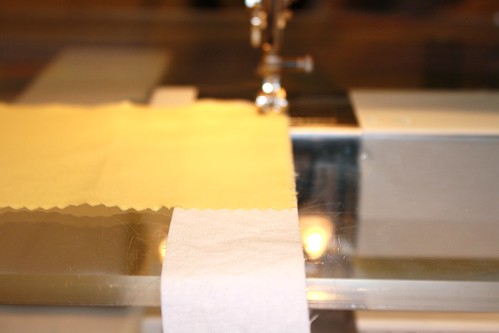
I generally snip my strips away from my blocks with scissors but if you would prefer you can use a rotary cutter or chain piece and then cut as I described in my earlier post. I typically repeat this for all of my squares until I have one side sewn for all.
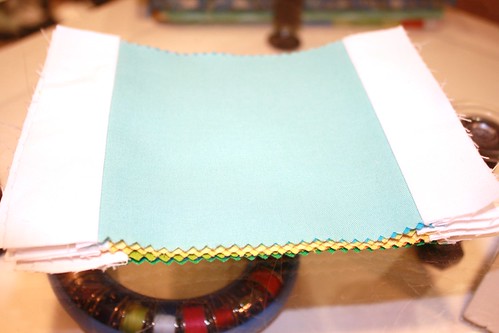
Step 2: Sew your strip to the opposite side of the square you just sewed and trim the border strip as described in step 1. Repeat for all squares. Press.
Step 4: Repeat the same steps for the remaining two sides.
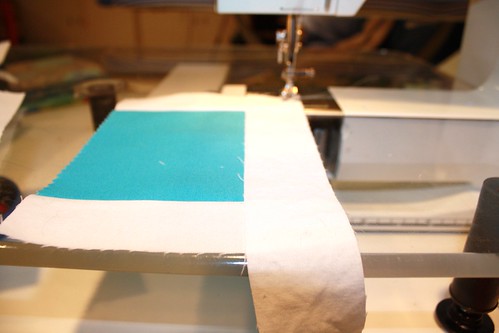

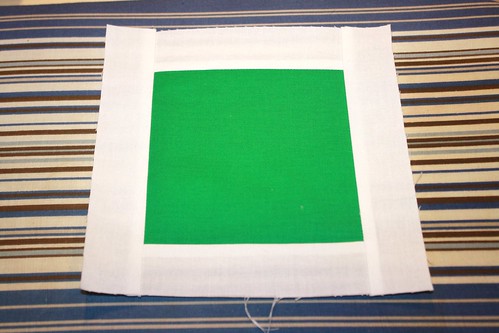
Until you have a big stack of pressed squares bordered on all 4 sides.
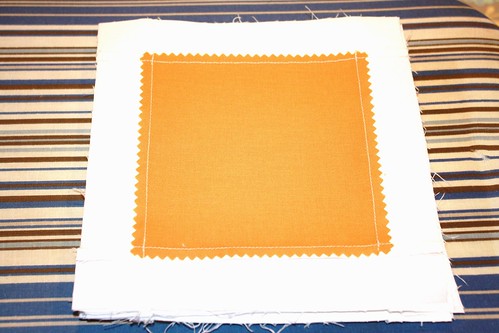
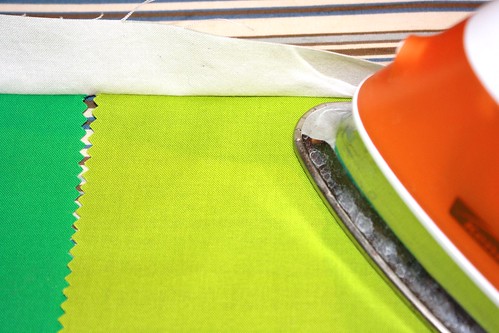
By the way, typically you should press your fabric toward the darker color, otherwise the darker color might show through to the other side. The above photos show that I pressed toward the lighter color. To be honest I really couldn't see my colored fabrics through the white so I didn't worry too much about it. It is up to you which direction you decide to press, and will also depend on your own fabric choices.
I hope this helps clear up any confusion! Please let me know if you have questions about any of the QAL steps. I would be happy to clarify any step in the process to make sure you are having the most enjoyable, successful experience possible.
Happy Quilting!
Step 1: Sew your square and strip together using a 1/4" seam. Make sure that the edge of the square and the edge of the strips line up as you guide your fabric under your machine. You can pin the pieces in place if you prefer.
I generally snip my strips away from my blocks with scissors but if you would prefer you can use a rotary cutter or chain piece and then cut as I described in my earlier post. I typically repeat this for all of my squares until I have one side sewn for all.
Step 2: Sew your strip to the opposite side of the square you just sewed and trim the border strip as described in step 1. Repeat for all squares. Press.
Step 4: Repeat the same steps for the remaining two sides.
Until you have a big stack of pressed squares bordered on all 4 sides.
By the way, typically you should press your fabric toward the darker color, otherwise the darker color might show through to the other side. The above photos show that I pressed toward the lighter color. To be honest I really couldn't see my colored fabrics through the white so I didn't worry too much about it. It is up to you which direction you decide to press, and will also depend on your own fabric choices.
I hope this helps clear up any confusion! Please let me know if you have questions about any of the QAL steps. I would be happy to clarify any step in the process to make sure you are having the most enjoyable, successful experience possible.
Happy Quilting!
Sunday, May 22, 2011
Marshmallow Brochette QAL-Part 2
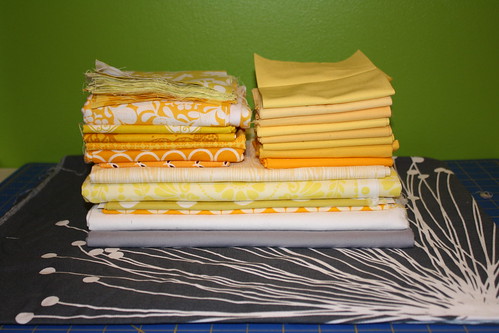
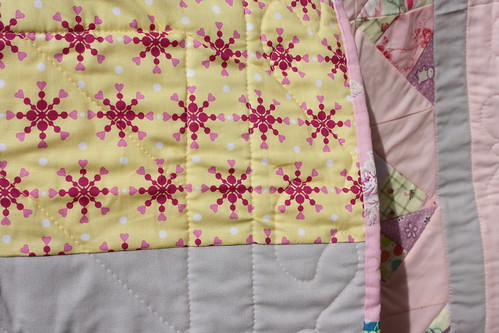
The fancy gray fabric on the bottom is an IKEA print I plan to use for the backing.
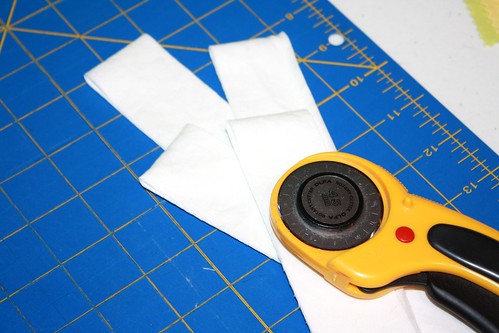
Step 1: Cut your 5" squares. If you bought charms you're already a step ahead! You will need 9 for the mini quilt or 36 for the lap quilt.

Step 2: Cut 1.5" inch strips. By my calculations you will need fourteen 1.5" strips to border your squares or six 1.5" strips to connect them for the lap quilt. You will need seven 1.5" strips total for the mini quilt.
Step 3: Border all of your squares with your 1.5" strips using a 1/4″ seam. You can piece, press, and trim with your rotary cutter:
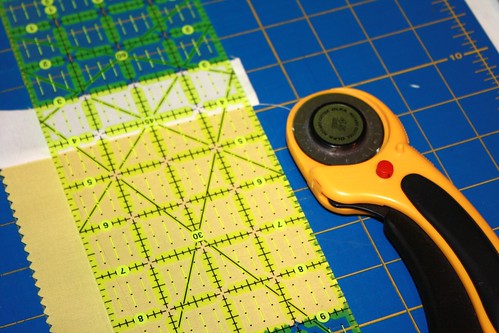
flip and snip:

or chain piece
This is really a matter of personal preference! I tried it all three ways and decided I prefer to flip and snip but I won’t be offended if you don’t like that method.
Press your seams as you go …
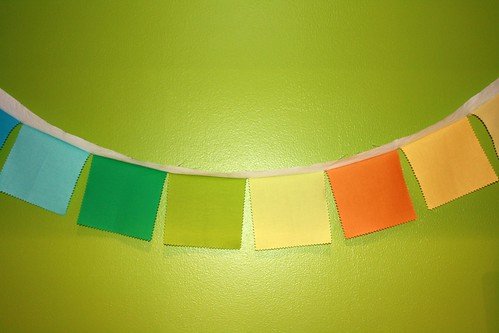
… and keep plugging until all 9 or 36 of your squares are bordered on all 4 sides.
Those of you into precision should trim down your squares so that they are all exactly the same size at this point.
Step 4: Cut your background strips which will become part of the connectors for your squares. You will need twelve 3.25" by width of fabric (WOF) strips for the lap quilt or two 3.25" by WOF strips for the mini quilt.

Step 5: Piece your background and connecting strips, with a 1/4" seam allowance, so that your 1.5" strip is in the middle of your two larger background strips. Press your seams towards whichever fabric is the darker color.

Step 6: Cut your 5" and 2.5" strips. You will need two 2" strips and two 5" strips for the mini quilt. You will need six 2" strips and eight 5" strips for the lap quilt.
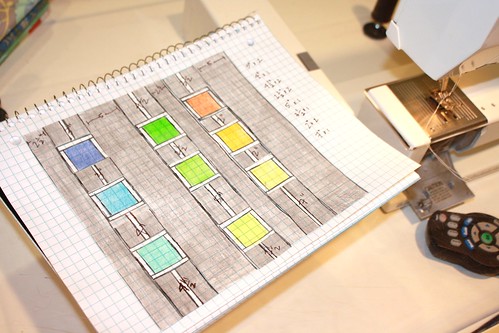
Step 7: For the lap quilt, you will need to combine your strips in order to get the length you need for the columns. Sew the 2" strips together in pairs on the short end so that you get long strips of fabric. You can do the same with the 5" strips but in my mock up I have cut one of the pair of strips in half and sewn it to either side of the paired strip so that I get 1 long strip with a top short segment, middle long segment, and bottom short segment. I did this so that my seams would be staggered instead of all in line with each other. It is up to you whether you would like them to be all the same, staggered by column (every other one), or by size (all 5" one way, all 2" another way as shown in the mock up). This is a matter of personal preference and won't affect the pattern.

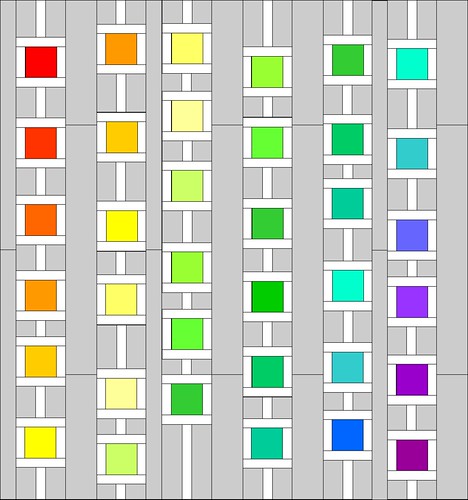
Next week we will be laying out our quilt, cutting our connectors, and piecing the top. If you're like me and need a visual aid to help you plan your quilt out, plan to get some graph paper, pencils or markers, and some tape.
You can join the QAL anytime. If you are joining us, make sure to join the Threaded Mess Marshmallow Brochette flickr group (if you haven't already) and share pictures of your progress so that we can all cheer you on!
Happy Quilting
Subscribe to:
Posts (Atom)